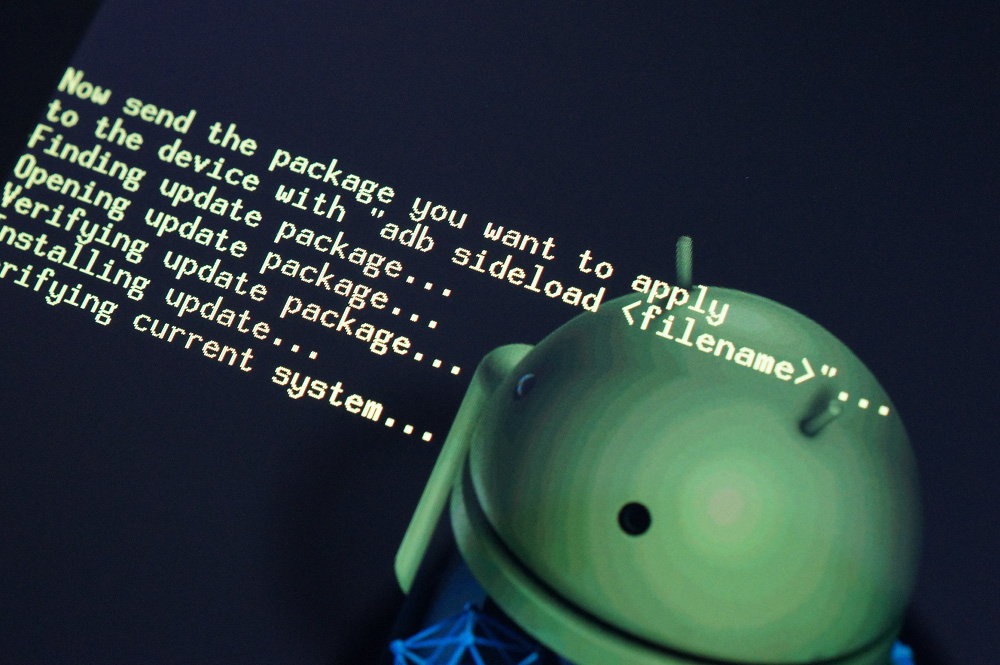
Back in the early releases of Jelly Bean, Google introduced a new command to adb called “sideload.” Using the sideload command, and the newest version of adb from the Android SDK, one could update their Nexus device through stock recovery, without having to root or flash a custom recovery. It’s something we wish was there from day one, however, at least we have it now. And I know that many of you feel that Nexus devices shouldn’t ever have a stock recovery and that they should be hacked on daily, but try to keep in mind that some like Nexus phones and tablets because of constant updates and a 100% stock version of Android.
As someone that has a decent grip on drivers and adb, I have to admit that adb sideload has given me issues since it was introduced, which is why I have yet to fully write a guide about it. But with today’s Android 4.2.2 update becoming available, I decided to take a second look at the process and finally found some solutions to the issues that have taken hours away from my life.
One had to do with my device ID not registering through the USB driver, requiring a manual edit of the “winusb.inf” file. The other was a Windows 8 security issue that wouldn’t allow me to install drivers that had not been signed, which is something that happens after you start manually editing driver files.
So for those that keep it stock and still want to update early with the cool kids, this guide is for you. Below, you’ll find the instructions to adb sideload, with extra posts coming later that will help with some specific issues that I ran into.
*Instructions are for a Nexus device when connected to a Windows 8 PC.
Instructions: How to use “adb sideload”
1. First, you need to install the latest Android SDK (or at least steal the newest adb.exe from it). [Android SDK]
*This isn’t a guide on how to get the SDK installed or basic adb. There are dozens of those out there.
2. Plug in your device to your Windows machine. Make sure USB Debugging is enabled.
3. To test that you have adb up and running, and that your device is recognized, open a command prompt.
*The best place to open a command prompt is from within the Platform-Tools in the SDK. Hold SHIFT and the right-click and choose “Open command prompt…”
5. Type the following
adb devices
6. You should get a serial number followed by “device.”
015d182f9a0aac28 device
7. If you see something along those lines, your adb is working properly, for now.
8. Download the update.zip from Google to your PC that you would like to install on your Nexus.
9. Move the file into your Platform-Tools folder.
10. Type the following:
adb reboot bootloader
11. Your device will now reboot to the bootloader.
12. Use Volume Down on your device to until you see “Recovery.”
13. Select it with the Power button.
14. Your device will boot to an Android logo with a exclamation mark.
15. To jump past this, press Volume Up and Power at the same time.
*Depending on the phone, you may have to press Volume Up first, then Power. On the Nexus 5, though, you press Power first, then Volume Up.
16. You will now be in stock recovery.
17. With Volume Down, highlight “apply update from ADB.” Press Power to choose it.
18. Back to your PC, type the following command:
adb sideload <filename of update.zip>
*I tend to rename update files to something simple when I get them. For example, the 4.2.2 update for the Nexus 7 I renamed to JDQ39.zip, so my command was “adb sideload JDQ39.zip”
19. If your adb is working properly, you should see the file transfer to your device in adb.
*If you get nothing, it’s time to troubleshoot. This trick really helped me.
20. Once that finishes, your device will begin to update.
21. Once it has finished, simply reboot and enjoy the update.
Hope this helps.


Can I root from adb sideload with root.zip(custom root.zip)
Terrific! It worked, but with a couple of major caveats. I was getting the device not found error during the sideload attempt (but not before that point), due to Windows 8 locking down which drivers were being installed. I found the following two instruction sets from other web pages (primarily http://forum.xda-developers.com/showthread.php?t=1392310) critical to making this work. If you, too, have Windows 8 x64 (Pro, for me), you’ll probably need to take these steps, too:
—
Q. I have Windows 8 and cannot install the drivers
How to Disable Driver Signature Enforcement in Windows 8:
From the Metro Start Screen, open Settings (move your mouse to the bottom-right-corner of the screen and wait for the pop-out bar to appear, then click the Gear icon).
Click ‘More PC Settings’.
Click ‘General’.
Scroll down, and click ‘Restart now’ under ‘Advanced startup’.
Wait a bit.
Click ‘Troubleshoot’.
Click ‘Advanced Options’
Click ‘Windows Startup Settings’
Click Restart.
When your computer restarts, select ‘Disable driver signature enforcement‘ from the list. You can now load your modified driver. The one that worked for me was PDANet for Android (Win8 compatible): http://pdanet.co/bin/PdaNetA4013.exe
Overwrite the old files and accept the security warnings. It may give you an error and automatically uninstall PDANet, but the drivers will stay on your system.
Reboot again once the driver is installed and all will be well and you can proceed with the instructions fully as instructed in the main post above.
Now FINALLY enjoy 4.2.2 on your Verizon Galaxy Nexus!!!
The adb sideload method worked for me! Thanks
hmmm, my adb is working, but my androidSDK doesn’t seem to have the adb sideload command. I just installed the new one too. I search the SDK site for adb commands and sideload is not listed anywhere. Was it removed? Any ideas?
I have this same issue… No solution yet. Anyone?
#10 should read “adb reboot recovery”. You can then eliminate steps 11-15
If you are going to make a promise please uphold it. Or at least remove the part of the article that says the lie.
thaaaaaaaaaaaaaaaaaaaank you
Ok. I’m getting frustrated. Everything works fine UP TO when I type adb sideload…..it comes back saying error: device not found. Sure enough, when I type adb devices, nothing is listed. however, when I type adb devices at the start of this process, it’s found!!! Any thoughts?
On my GSM GNex I get to step 17 and in the device manager I see “Other devices” come back with “Galaxy Nexus” with a yellow ! over it. I’m on Windows 7 64-bit.
Ideas? I really want to get this working! Thanks.
I rooted my gnex then reflashed stock recovery/relocked bootloader and then used this to apply the update 😀
Any update on the device ID not registering through the USB driver, requiring a manual edit of the “winusb.inf” file? I have tried unsuccessfully to add my hardware ID to the “winusb.inf” file and need some guidance.
I had the same problem after searching for hours i finally got this:
add the following to android_winusb :
[Google.NTx86]
; !– snip other devices… –!
; Google Nexus 7
; !– snip existing device IDs –!
; This is the HardwareID shown in Device Manager for the “Nexus”
; device when in Recovery mode
%CompositeAdbInterface% = USB_Install, USBVID_18D1&PID_D001
Then uninstall the “Not identified” Nexus 7 through device manager then reinstall driver with the modified android_winusb file.
Hope it helps:)
I stumbled upon that as well thanks! Unfortunately, I entered the wrong Hardware ID the first (several) time I tried it. Once I got the recovery Hardware ID, all was good.
good for u
Anyone have the magic addition for the Galaxy Nexus?
Doesn’t work for me on Win 8 64 bit. adb appears to be working up until when i try to sideload the update. nothing happens and i just get a bunch of messages in command prompt. Any ideas?
Ok i just followed a guide on installing the sdk and getting adb running…i checked and my adb was running…i turned on usb debugging and connected my nexus 7 but after typing in “adb devices”, my serial number and the word “device” does not show up….my computer recognizes my devices as Nexus 7, anybody help me out here?
need this too!
How do I get root back? I have SuperSU that was installed via Nexus Root Toolkit.
Reflashing SuperSU using a custom recovery seemed to work for me.
“error: device not found”. Yet I just booted into recovery mode without any problems via the usb cable. Any ideas?
Ditto. i think it’s a driver issue though. the first try it failed to install a driver but i didn’t notice it until after i ran “adb sideload…” which gave me same error. So i went through it again. It didn’t try to install any drivers the next go round. but the same error.
OK: got it to work. it was a driver issue of some kind. i ended up downloading and installing the Nexus 7 Toolkit from XDA. from there chose option to install drivers. rebooted pc and 7. tried Kellex steps above, viola, 4.2.2
no need to download the toolkit just add the following to android_winusb :
[Google.NTx86]
; !– snip other devices… –!
; Google Nexus 7
; !– snip existing device IDs –!
; This is the HardwareID shown in Device Manager for the “Nexus”
; device when in Recovery mode
%CompositeAdbInterface% = USB_Install, USBVID_18D1&PID_D001
Then uninstall the “Not identified” Nexus 7 through device manager then reinstall driver with the modified android_winusb file.
Hope it helps:)
This should be added to the [Google.NTamd64] section if you’re on a 64 bit system.
Umm….. does update.zip on the root of the storage device not work anymore?
I skipped a generation of Android, so for me this stopped working after the Droid Incredible, IE this didn’t work when I came back to Android with the Galaxy Nexus.
At least now you don’t need an unlocked bootloader to apply updates like you did with the GN.
Just flashed to my N4, locked/stock/no-root whatever, worked great except one minor detail:
Getting into stock recovery (android lying down, red exclamation point), it’s press power button first, then volume up, then release.
This might be obvious to some, but having never done this, I had to Google for an answer when it didn’t work.
Does this work only with the stock ROMS or does it work with any of the custom ones as well?
Does it work for downgrades if you have the files?
Maybe, but why would you want to?
Umm… do people make those files? An update file does not simply tell it “activate version x”, but rather, it deletes and replaces new files. If you happen to have a file that deletes all of the new files and replaces them with old ones, then sure, this will work. But I don’t believe you have that kind of file.
I thought you could get stock images, not just updates.
The update adding multiple users I would’ve backed down until stuff became more stable with it.
Anyone try this using a Windows 7 machine? Willing to give this a shot but see it was done on Windows 8.
Just did mine on a Windows 7 machine. Worked like a charm.
Working on my Windows 8 64 bit
“but try to keep in mind that some like Nexus phones and tablets because of constant updates and a 100% stock version of Android. ” And you keep in mind that these people you speak of have no clue how enter recovery much less use adb sideload.
Not true. I used to root and ROM and overclock back in the Droid 1 & 2 days. I did it mostly to make up for the deficiencies of Android, or to make my Droid 1 fast enough to play FF7 smoothly. With the Droid 2 I rooted and ran ROM’s to remove the Verizon Bloat. With my Verizon Galaxy Nexus I ran ROM’s because VZW sucks at pushing updates in a timely manner.
Not an issue with my Nexus 4 & 7. All I really want is a stock ROM that is updated quickly. That’s why I ran “Shiny” on my GNex.
TL;DR
You’re wrong, some people just want stock and fast updates. I just pushed the 4.2.2 update to my stock/unrooted N7 on my Linux Mint box.
False. I keep mine bone stock, and used adb sideload earlier.
Custom ROMs are a pain in the ass. Something is always broken, and something else always breaks with a new update. For the people who don’t want to ride the endless merry-go-round of broken features, but want root, stock works fantastic.
I use 100% stock and know my way around adb very well from my days of flashing ROMs and kernels.
been wrestling with this update all day on my nexus 7 – this method worked great – thank you
But.. but.. isn’t the point of buying a Nexus so you don’t have to do things like this 🙂
The point of buying a nexus is that you can do whatever the crap you want with it!
The point of Nexus is having the latest and greatest from Google. The other point is that the impatient among us can do as they please.
I guess you missed the implied sarcasm 😉
Now that I re-read your comment I am picking up on the hints of sarcasm…