A few years ago, I had the idea of wanting to get into astrophotography. This is the art of photographing objects in the night sky, such as distant galaxies, nebulae, and things of that nature. What I quickly found out is that not only is astrophotography ridiculously time consuming, it can be just as expensive. I already have a couple of other hobbies that consume enough of my time and money, so I stuck to taking star and moon pictures on my smartphone through an inexpensive telescope I got at a garage sale. While I wasn’t taking glorious, high-resolution shots of Andromeda, my passion for looking up at night remained intact.
Because our universe works in mysterious ways, it was around this time that I received an email for a Kickstarter project published by Unistellar. The project was for something called eVscope, which was and eventually came to be a somewhat non traditional telescope device that is described as being “100x more powerful than a classical telescope.” Typically, when claims like this are made, especially when on Kickstarter, it sounds a little too good to be true.
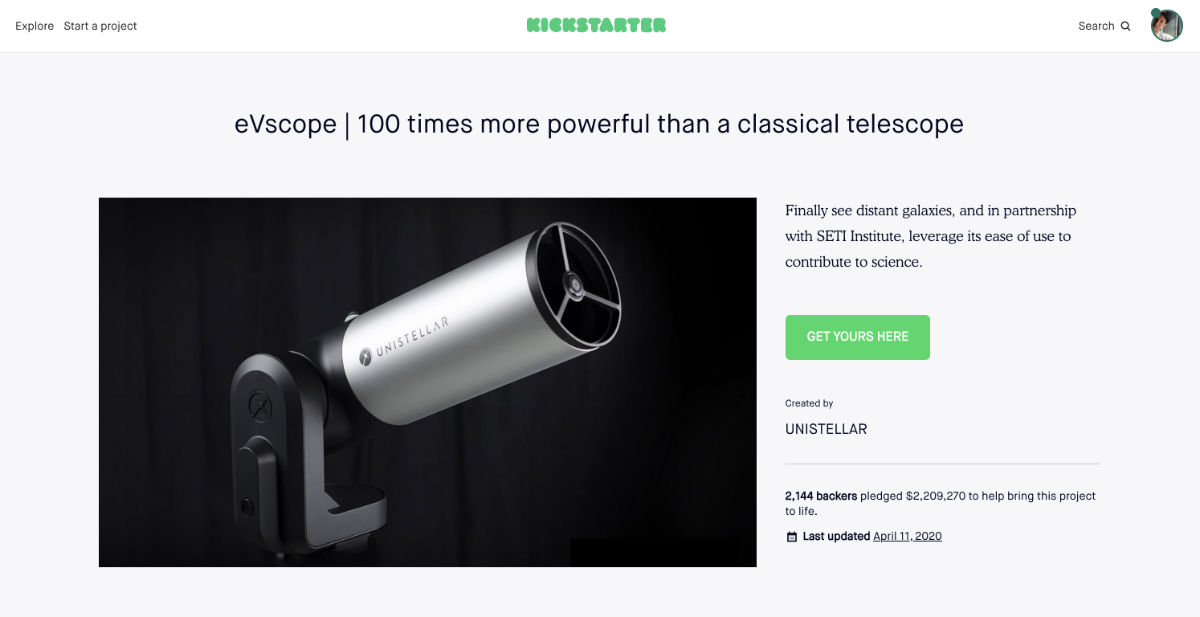
There was an Early Bird special if you backed the project in its infancy, priced at $1,299. Looking at sample images on Kickstarter, I was very tempted to take the plunge, but I told myself that I’d rather wait to see if the project would be funded and wasn’t another bullsh*t crowdfunding scam.
Time went by and eventually, Unistellar racked up over $2.2 million in funding. I felt foolish for missing my chance to own one of these devices at a significant discount compared to their retail price that is currently listed at $3,058 (that’s with shipping). However, in an act of serendipity, Unistellar reached out via a newsletter and said they would be attending CES 2018. Given my job, I attend CES every year, so I made an effort to stop by the team’s booth to see the eVscope in person.
Given the booth was inside of a building, I couldn’t demo a unit right then and there. I asked if it’d be possible to demo eVscope in Las Vegas at night, but circumstances made the attempt not possible. At this point, I assumed I’d never get the chance to see this device.
Cut to April, 2020 and here I am, writing all of this in a review of the device, sent to me during quarantine courtesy of Unistellar. Life is interesting that way.
What is the eVscope?
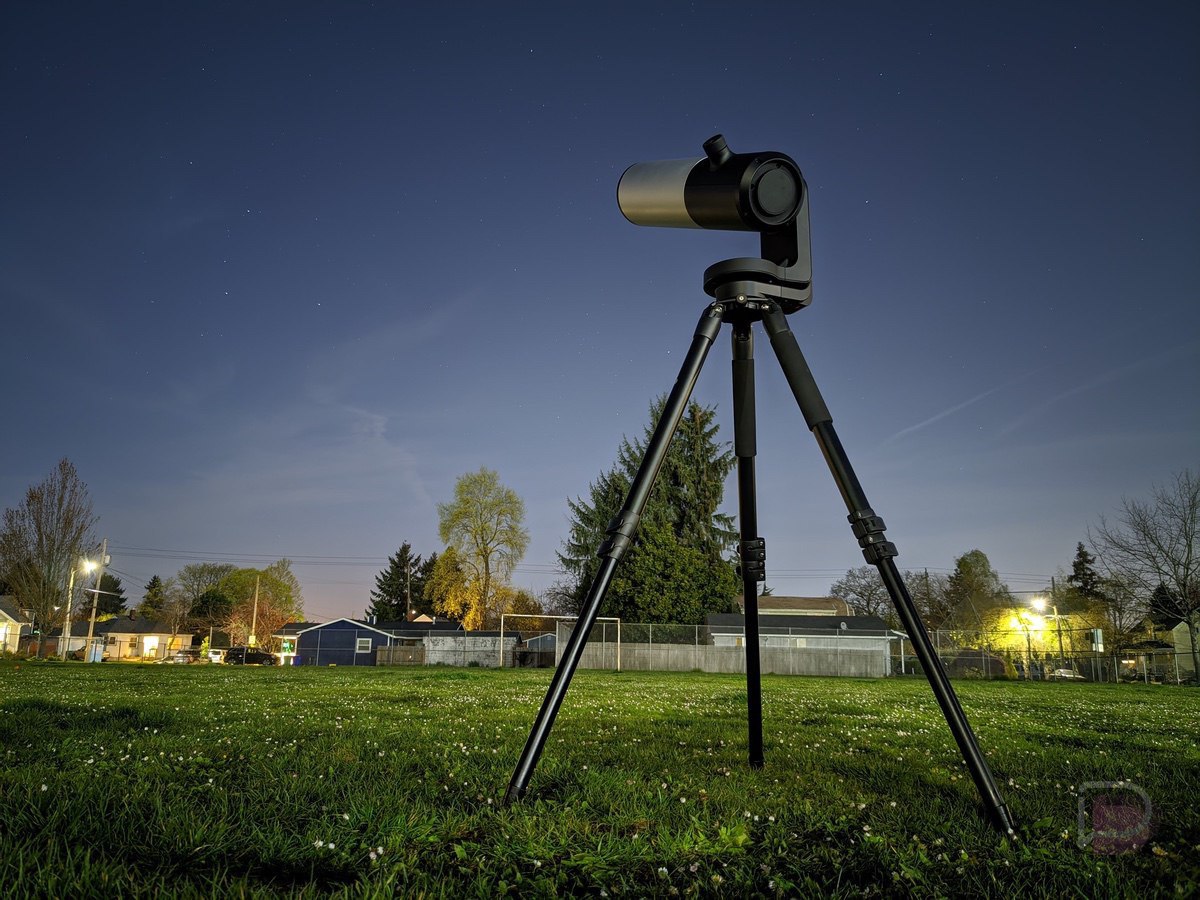
eVscope is a telescope, technically, but in a way for people to understand what it truly is, the best way of putting it would be a camera featuring a Sony IMX224 sensor, attached to a self-guiding computer that compiles images and spits them out onto your smart device.
In astrophotography, you sometimes take multiple pictures of an object, then stack them together using computer software for an image with great color and detail. To do that, you need a lot of equipment, which can easily cost you thousands upon thousands of dollars depending on the quality of gear you get. At most you need your camera, tripod, telescope rig, star tracking device, computer for the compiling, then all of the time it takes to make the image. It can be a very daunting process for those unfamiliar with it.
What Unistellar has done with the eVscope is taken all of that and crammed it into a single device that is extremely easy to operate. Not only have they essentially dumbed down the process so people like me can understand what’s happening and control it, but they’ve made the entire world of astronomy and citizen science more accessible to all.
Inside the eVscope, a lot of features are baked in to allow users the ability to get good images, even when not in a dark sky environment. As you’d expect, light pollution is a major factor for a lot of would-be stargazers, so an instrument like eVscope, with built-in noise and light pollution reduction software is a bonus. Even me in Portland, OR with plenty of light pollution is able to get some great shots.
For a more detailed, scientific breakdown of eVscope and its hardware, please look here.
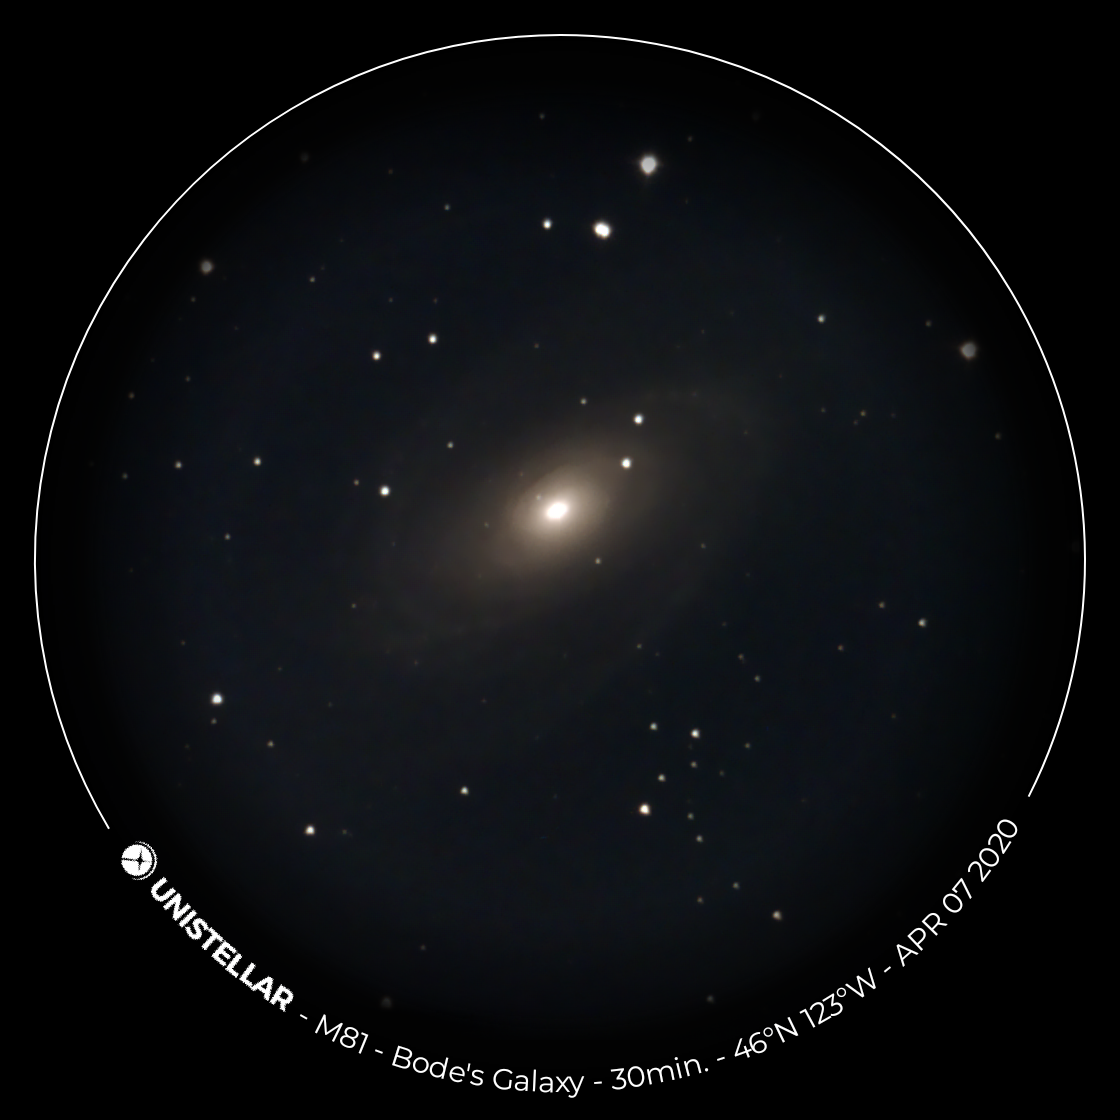
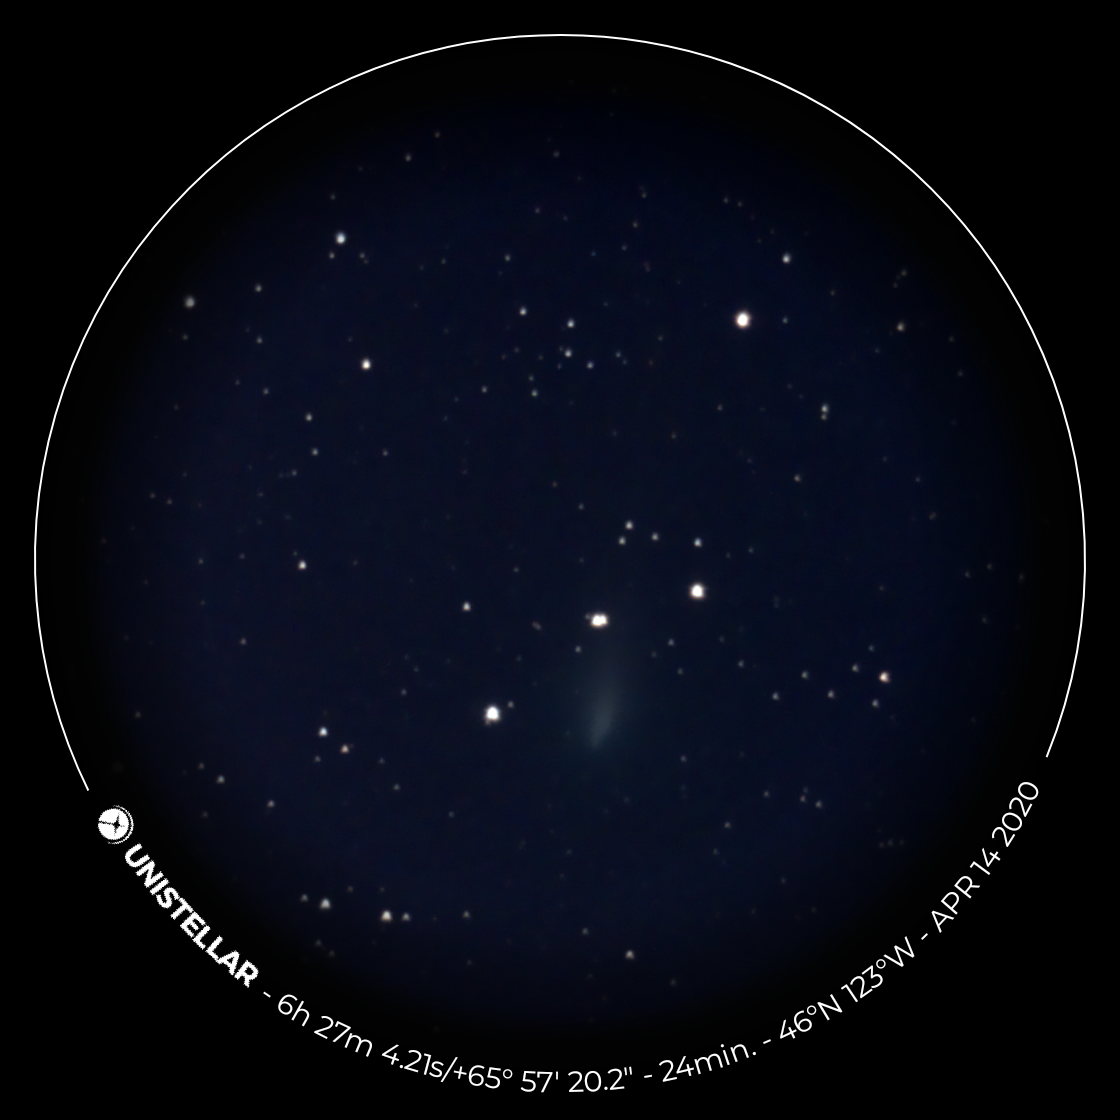
April 7 was the night of the full moon, as you can see.
Using eVscope.
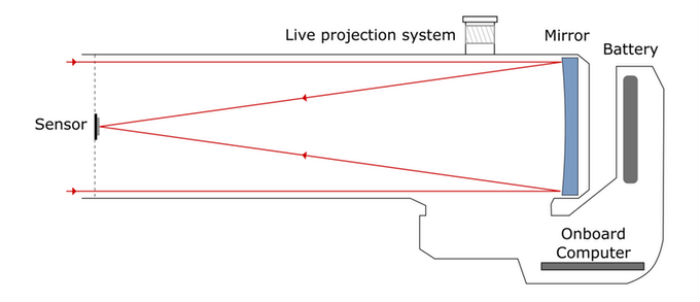
Let me briefly explain how eVscope works and how it differs from a traditional telescope. Light from whatever you’re trying to observe enters the device and bounces off of a mirror and hits the designed-for-low-light Sony sensor. That image is then sent to an onboard computer, as well as a live projection system (aka the eyepiece) and a live feed on your supported smartphone via a WiFi connection.
What separates eVscope from a “classical” telescope is its ability to enable Enhanced Vision (EV) inside of the Unistellar app, which is the image stacking process I referred to earlier that is utilized by skilled astrophotographers. Without EV, eVscope would be like any other basic telescope, only capable of showing you exactly what it sees with no additional image processing. It’s nothing special at all, which is why all talk surrounding this product deals with the Enhanced Vision turned on. It’s what makes this all so cool, to put it plainly.
For a comprehensive explanation of Enhanced Vision, because it really is something to marvel, I’ll let Unistellar tell you what’s happening.
Unistellar’s Enhanced Vision is a patent-pending technology that is based on the accumulation of light over short periods of time using a low light sensor, as well as on our proprietary algorithms of image processing that run on an on-board calculation module. The resulting amplified image is projected at infinite focus into the eye of the observer with an extremely high contrast ratio, creating a genuine and live experience of sky observation. Sensor settings and image processing parameters are automatically adjusted.
That’s how it works. Pretty straightforward, right? That’s sarcasm.
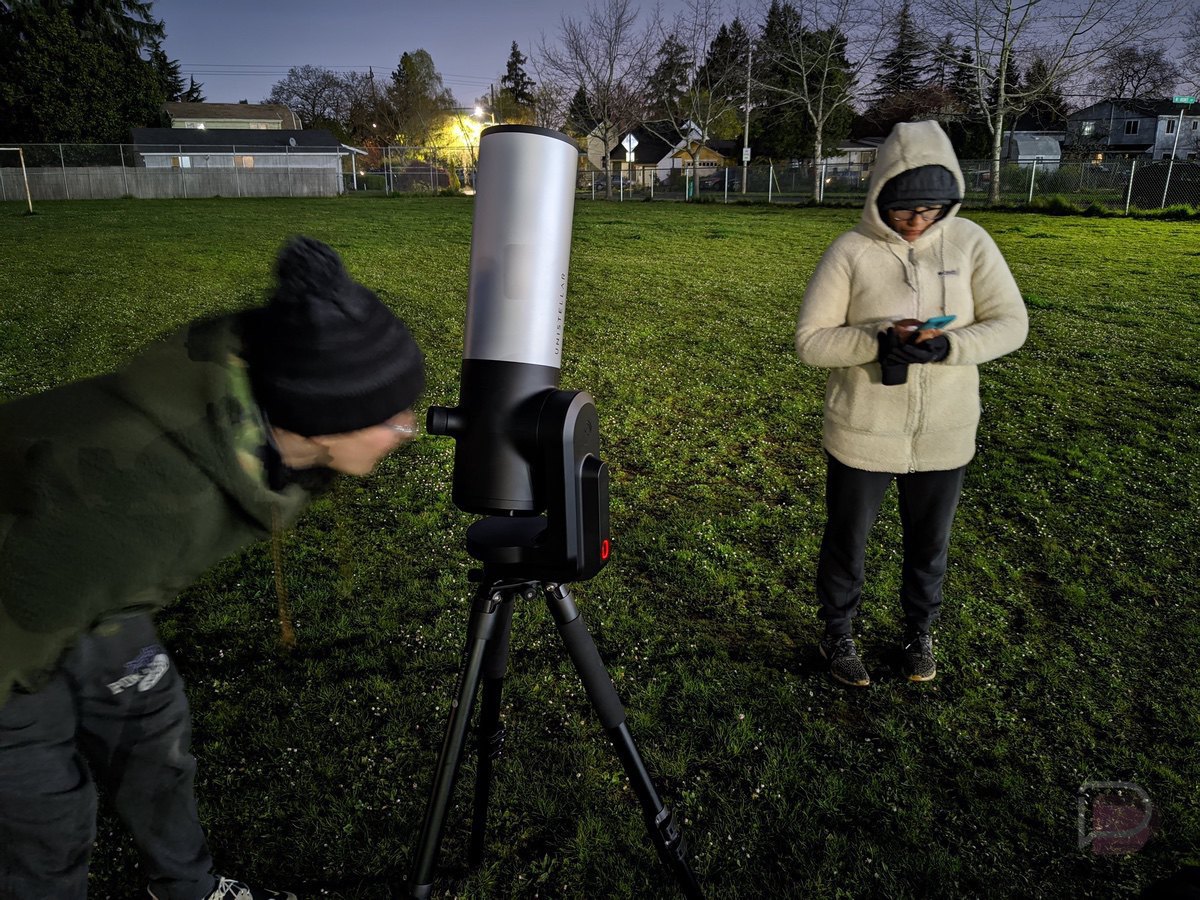
I’d label myself an advanced novice at best in the world of astronomy, but I do know my way around a basic telescope. Setting them up can be quite the task, but getting eVscope up and running is so easy I am certain anyone, even with no experience in this field, can do so within 5-10 minutes.
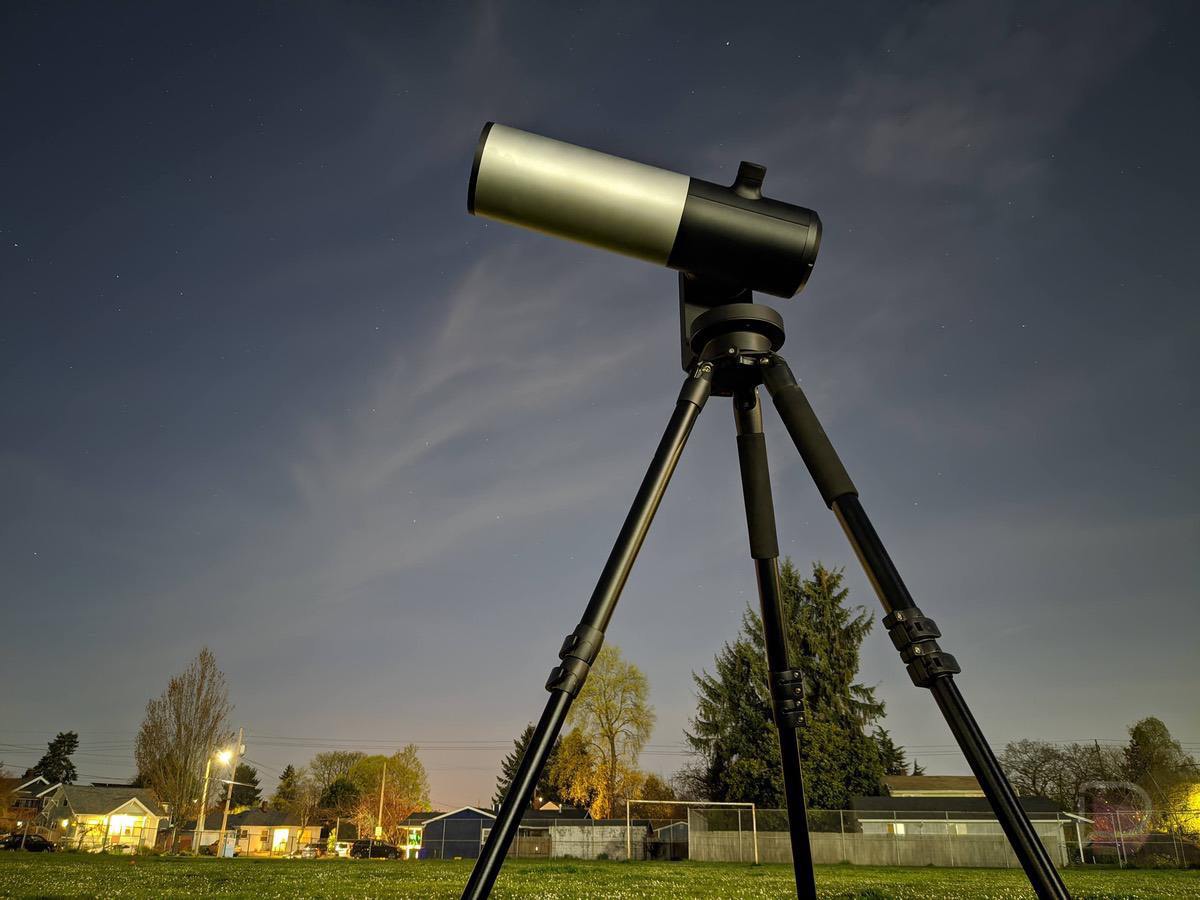
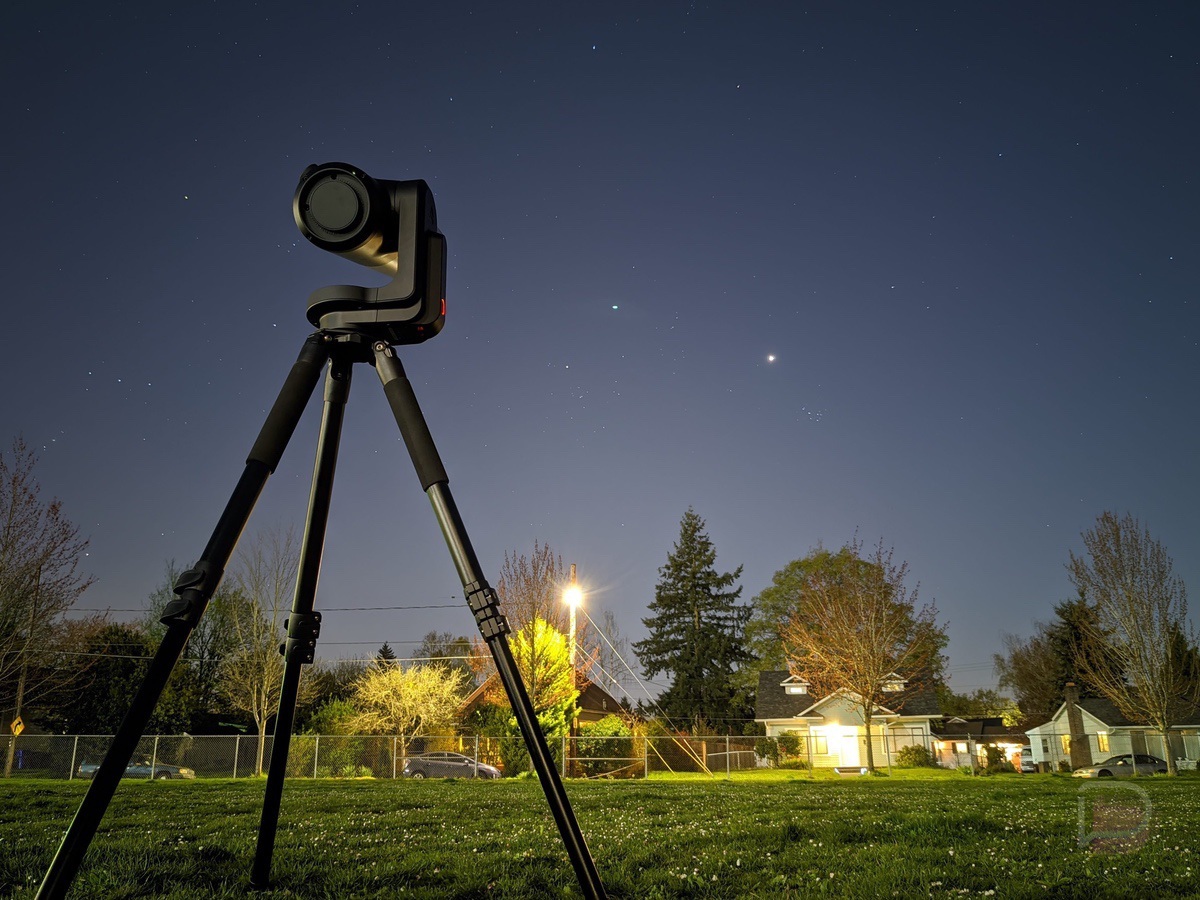
You take it out of the box, place it on the included tripod, tighten the screws, and turn it on. Connect your smart device over WiFi to the eVscope’s own WiFi network and you’re officially done and ready to view celestial objects. Compared to other scopes I’ve set up, that has got to be the most simple process I have ever come across.
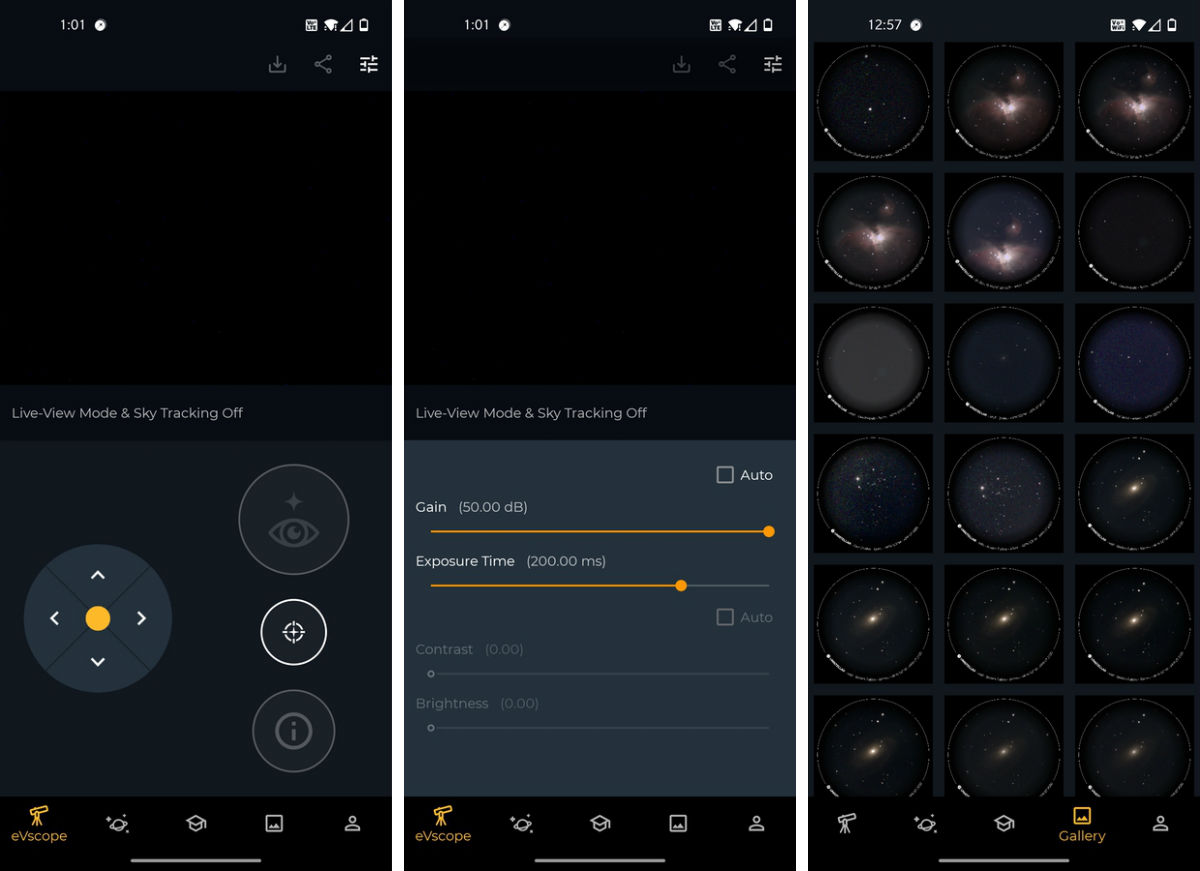
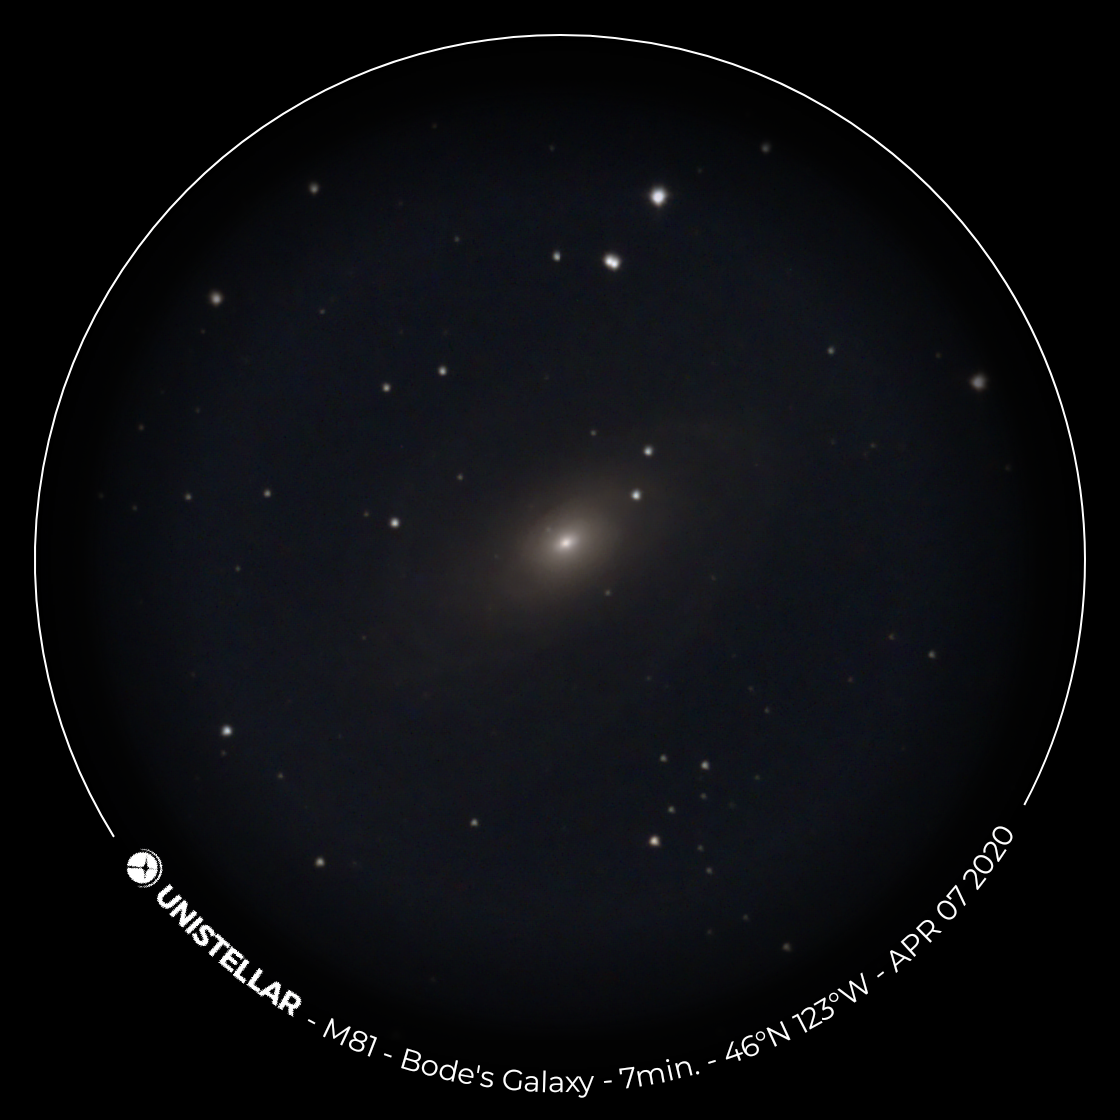
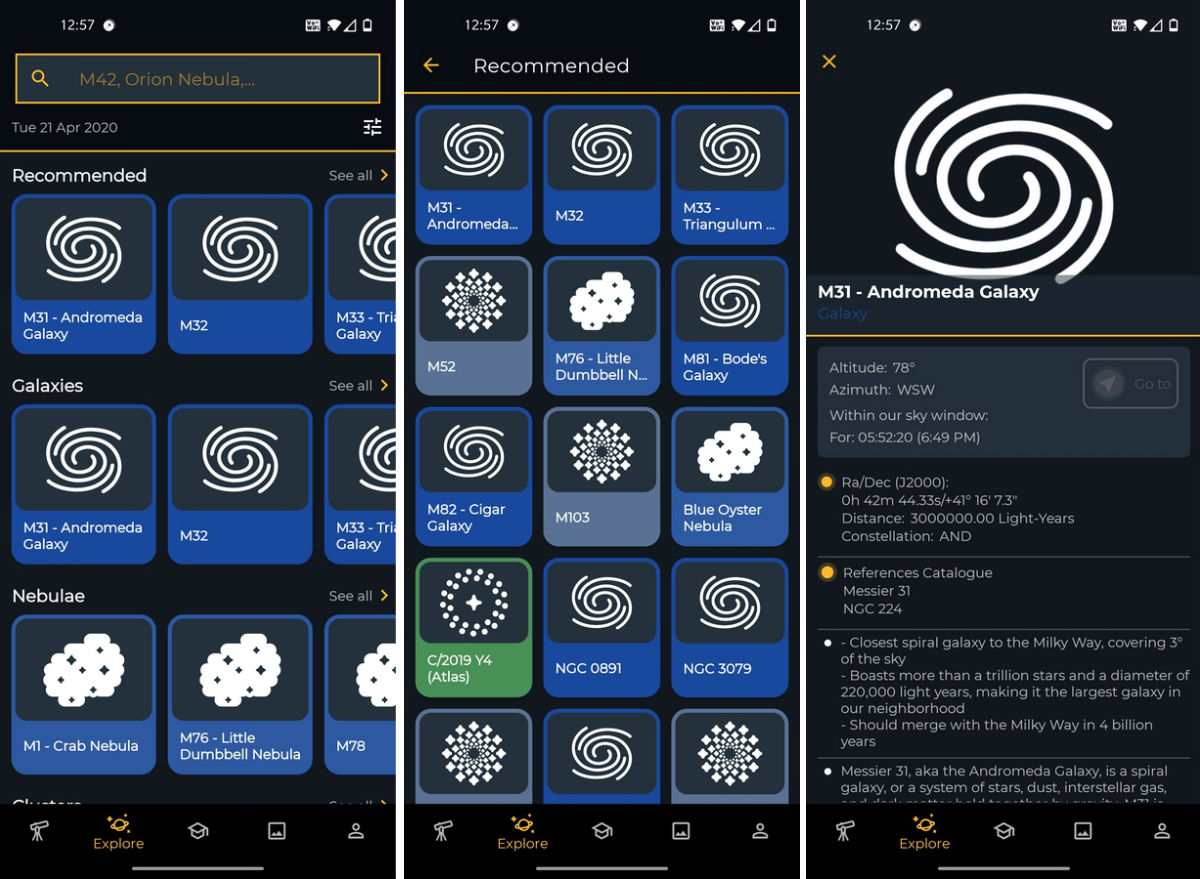
Once connected to eVscope on your device, you command the scope to autonomously recognize where it is and what it’s looking at. This is referred to as the Autonomous Field Detection (AFD) software and it’s incredibly accurate. Once field detection is complete, the Unistellar app has a catalog of over 4,800 objects in the sky that you can point at, track, and image. We’re talking galaxies, nebulae, asteroids, comets, star clusters, and basically everything in between. Keep in mind eVscope is designed for deep space imaging, so while looking at things like planets and moons in our own solar system is easily achievable, it’s not what this device is designed to do. My own expectations weren’t exactly fulfilled when I learned this, because I have long wanted to image Jupiter or Saturn. Oh well, entire galaxies will have to suffice.
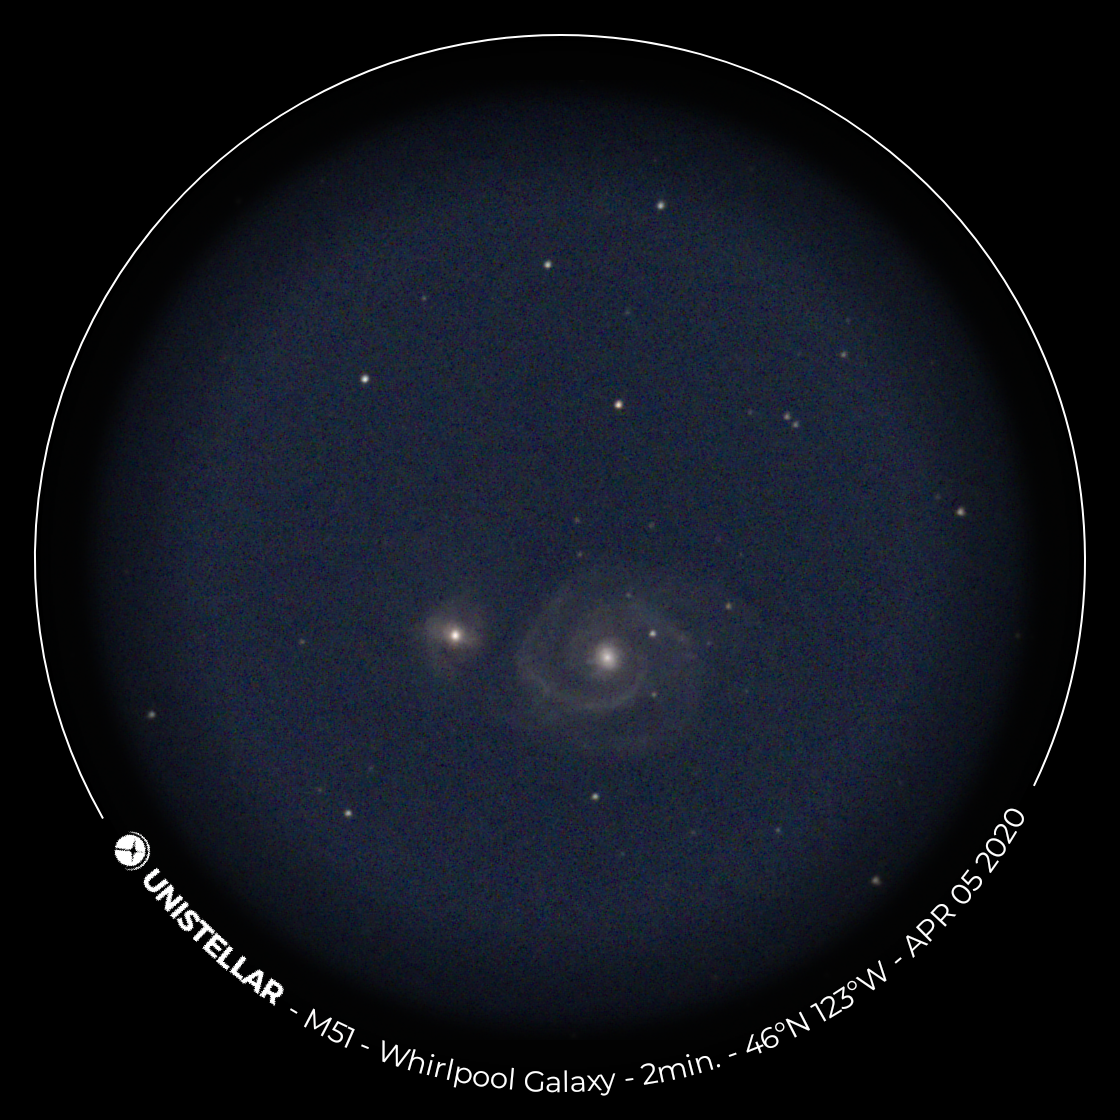
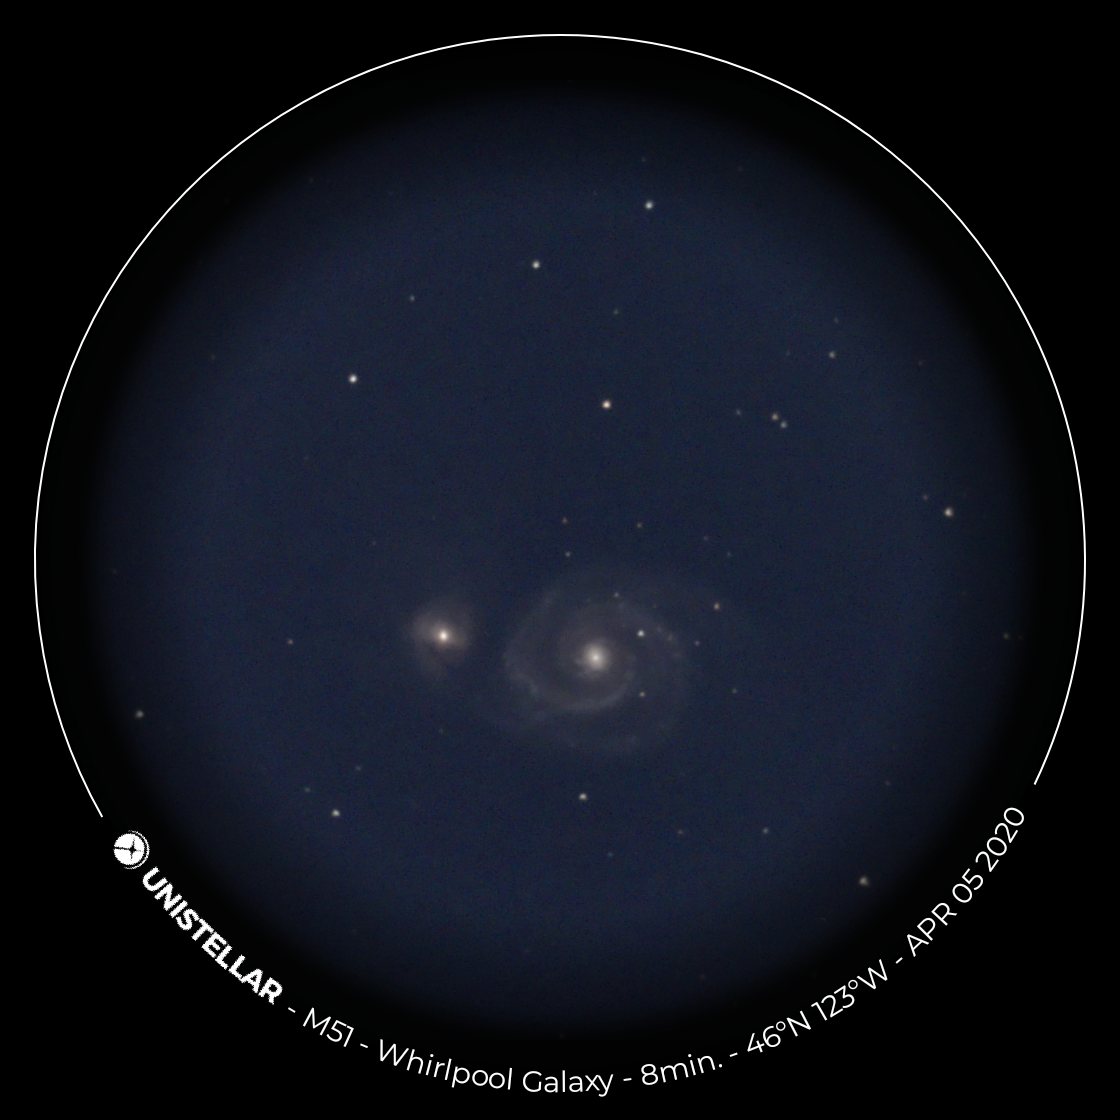
Once you have selected an object to observe from inside of the Unistellar app, eVscope maneuvers all by itself to view the object. It can go left, right, up, and down. Additionally, should eVscope not center the object just right, there’s a virtual joystick in the app that allows you to move the scope manually. Once your sights are set on the object, it’s time for the magic of Enhanced Vision. Once you hit the EV button inside of the app, the device begins collecting and compiling images to present on your smartphone and in the digital eyepiece. How long eVscope collects images is entirely up to the user, but the time you observe with EV enabled will directly affect the quality of your image.
Take the below images as an example. As you can see in the overlay, the more time you allow the image sensor to be exposed to the light, the better your image will be. This principle is the same for whether you’re shooting stars or shooting something terrestrial, but obviously, exposure time is critical when taking pictures of the night sky.
As you go around the sky collecting images, you can save them to your gallery and then share them with the world. You can post them to social media like I’ve done or just horde them and enjoy them on your smart device.
Citizen science is awesome.
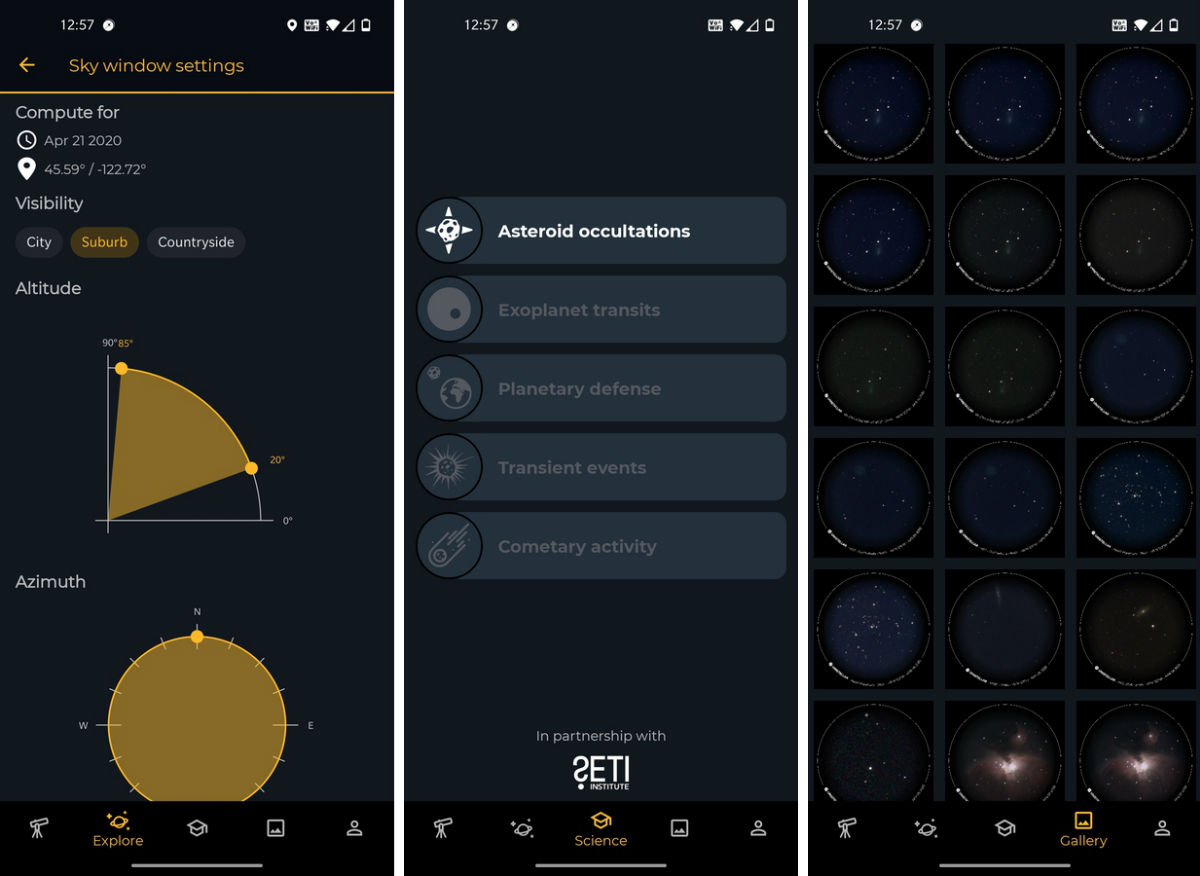
Once you’ve gone around the sky, collecting images from the Messier catalog or anything else you might want to see, it’s time to begin the other aspect of eVscope ownership. That is the citizen science aspect and it can be incredibly rewarding should you choose to participate.
Thanks to a partnership between Unistellar and the SETI Institute, eVscope owners belong to a network of citizen scientists that can directly impact ongoing research in the field of astronomy. For those who don’t know, which included me not too long ago, the SETI Institute is a not-for-profit research organization originally co-founded by Carl Sagan, with a mission to explore, understand, and explain the origin and nature of life in the universe. There’s a great writeup about the partnership between SETI Institute and Unistellar that you can read here, but the takeaway is that eVscope owners have the ability to directly help actual scientists, something I’m all for.
You may have heard about Comet ATLAS recently. It was supposed to streak by Earth and even be viewable with the human eye. Unfortunately, ATLAS has broken apart and won’t be the spectacle many had originally hoped for. However, thanks to citizen scientists with eVscopes on hand and scattered across the globe, we were able to produce the following image of ATLAS.
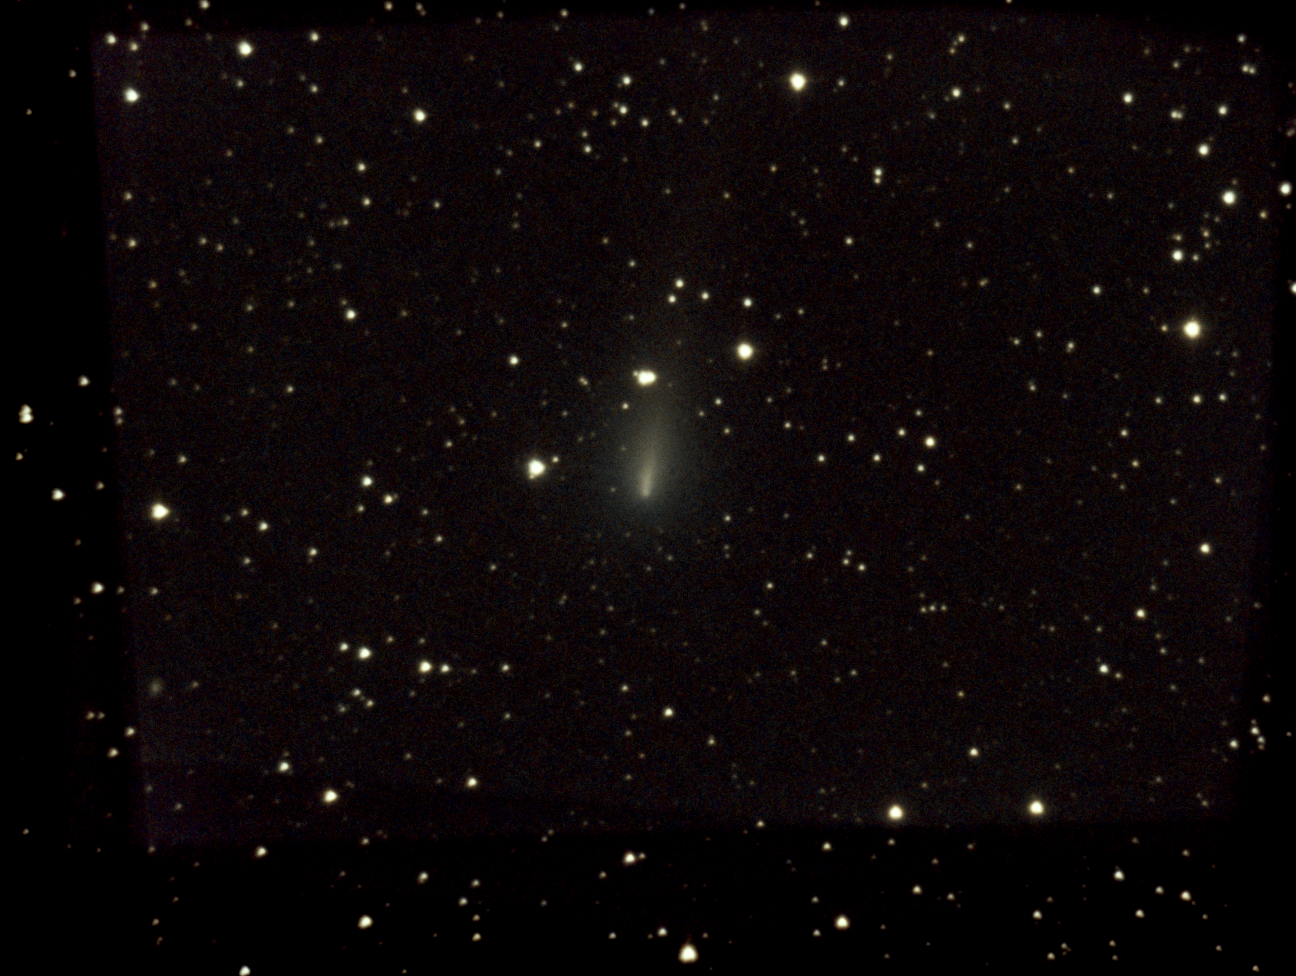
The above image is a composite of many images taken of Comet ATLAS. My own contribution to this “super image” of ATLAS can be viewed below. Alone, it’s definitely a comet, but it’s a bit lackluster. When grouped together with several other images, it turns into quite the image, with good detail and relatively low noise.
The beauty of this process is the ease of capturing the images and then helping actual scientists create data and images. On the night of April 11, I simply set up my eVscope in the driveway, plugged in the coordinates for ATLAS via the eVscope app, turned on Enhanced Vision, then walked away. I came back in 30 minutes, collected my images/data, then digitally shipped it off to Unistellar. They handled the rest. That’s how easy it can be, and from my standpoint, where maybe I don’t want to be sitting outside in the cold for hours capturing 45-minute exposures and dark frames to go with it, this is just the right amount of involvement.
As an eVscope owner, you can bet this won’t be the last project you can get your citizen scientist feet wet with.
Ease of access apparently ain’t cheap.
If you were one of the people to pick up an eVscope at its discounted pricing on Kickstarter, congratulations, you’re more trustworthy than I am that Unistellar was a real company making a real product. Hindsight being what it is, I also wish I had taken the plunge, because spending over $3K on a device such as this is quite the financial investment, especially during the uncertain times we find ourselves in.
From another perspective, though, this type of device is a great way to kill some time while many of us are stuck at home. And with the weather starting to get better as we leave winter behind us, I foresee eVscope owners sitting in their backyards on warm summer nights, kicking back and watching the night sky. For me, looking up at stars is a calming exercise, allowing my mind to get off of Earth-bound problems we face. Put simply, using eVscope or any telescope for that matter is a therapy session and I know plenty of people who pay good money to sit in a room for an hour and talk about things. Personally, I’d much rather be outside and looking up at the sky.
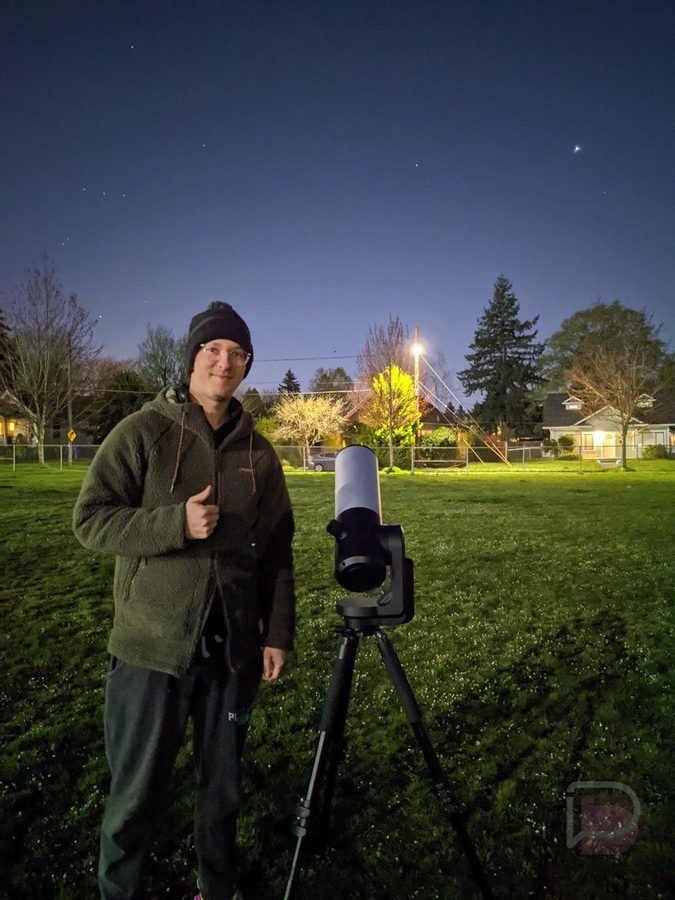
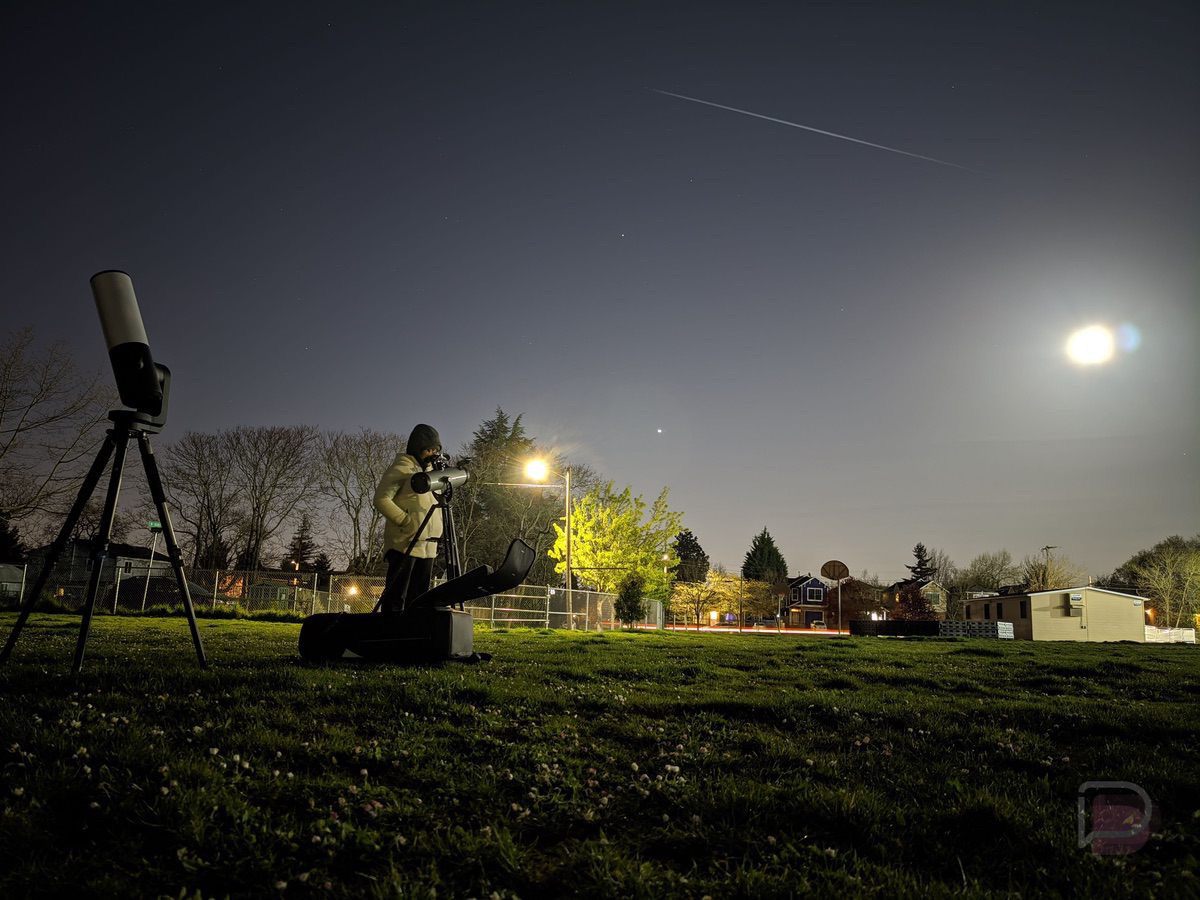
Me with eVscope and Venus. Light pollution is no problem!
For $3K+, are there some things I’d like to see improved? Yes, definitely, but even over the course of the two weeks I’ve used the system, it’s been improved via Unistellar app updates. For example, users were previously unable to save images without the Unistellar overlay you see in images. That has since changed and images can now be saved without it. Hooray!
My main gripe with this system is the overall digital essence of it. When using a traditional telescope and looking at objects, such as the moon or a star cluster, you get a real sense of that thing existing. Details can be exceptional and you know that what you’re viewing is actually sitting in the sky above you. On the eVscope, it’s hard to get that same sense of awe and realism from a phone’s display or the digital eyepiece. Yes, the Enhanced Vision allows you to see things you can’t usually see with your eye and you would need an astrophotography rig for, but it’s not as immersive or detailed as I hoped it would be.
At the end of the day, you are capable of setting up this device and within minutes, snapping shots of objects that are at times millions of lightyears away. To me, that’s pretty spectacular, even if I have to settle with it being a digital, somewhat grainy experience. Like any other technology, I imagine years from now, similar devices will exist that have better low-light sensors that will be capable of capturing images similar to the ones we see NASA publish. At least, that’s my hope.
So, while you’re capable of doing this all within no time at all, that ease of access has a price and it’s currently listed at $3K+. That’s a crazy amount of money, but if you’re like me and just want to hurry up and see some sweet stuff, without having to gather astrophotography equipment and learning new computer programs, Unistellar has a really fun and accessible offering here in the eVscope.