I’ve always loved the idea of having Nest security cameras surround my home, with live video feeds an ask away to my connected smart display or smartphone. However, we live in a world where Nest Cams cost $199 a pop, so getting a group of them is simply financially irresponsible for me. On the bright side, other companies exist and they also make security cameras designed for both indoor and outdoor usage. One of those companies is Reolink, a company that’s been pumping out security cameras since 2009. If you’ve ever shopped for a security camera on Amazon, it’s likely you’ve come across the name before.
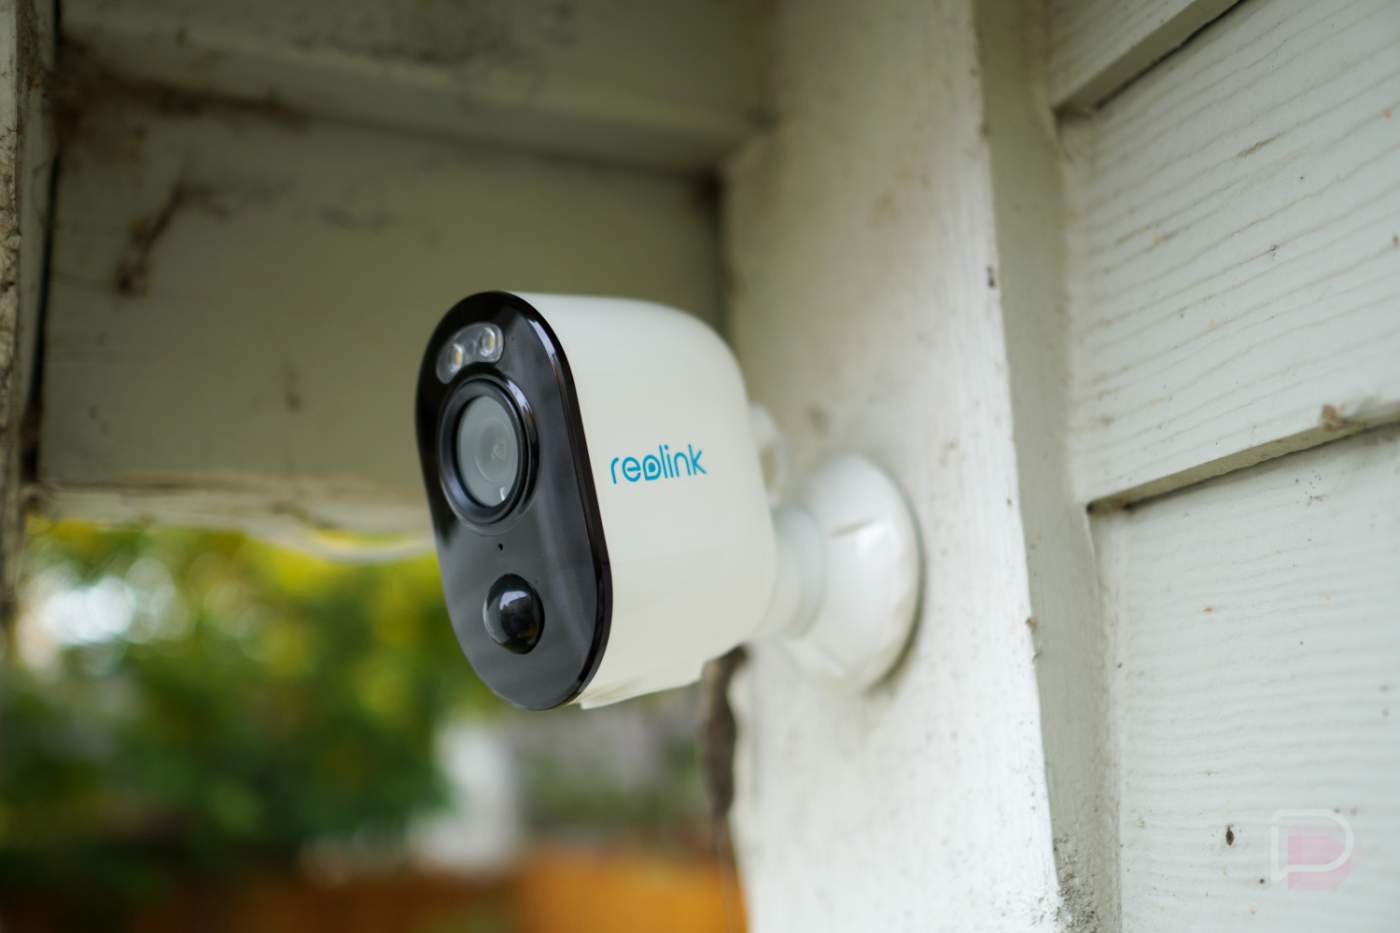
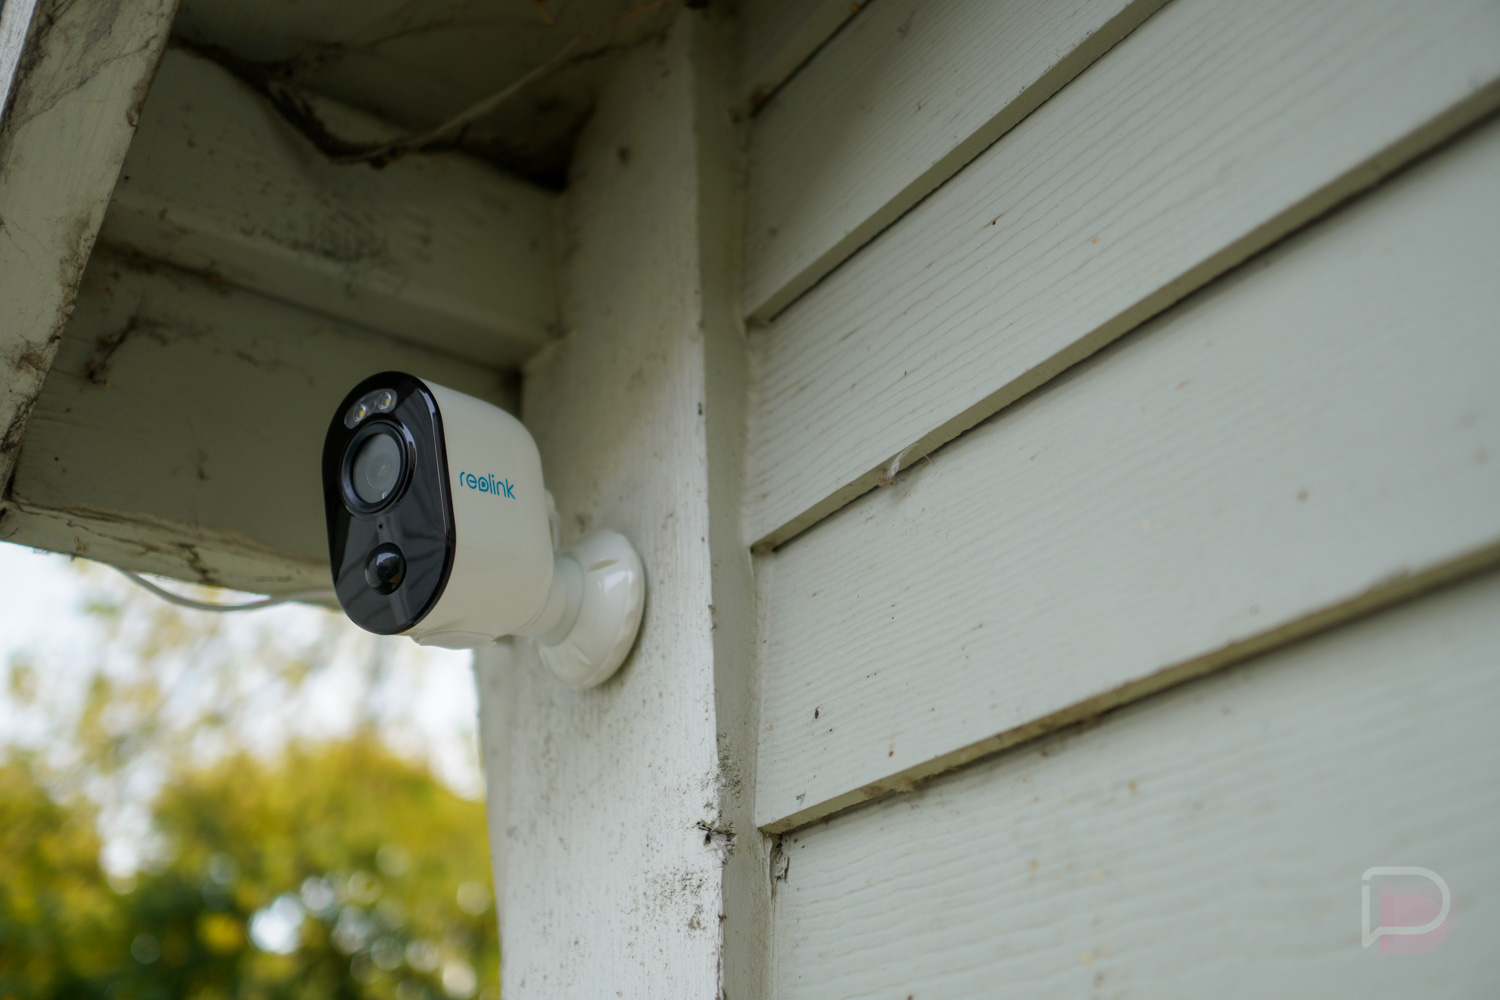
The company has a new camera on the way called the Argus 3, the latest iteration in the relatively popular Argus lineup. The Argus 3 features that separate it from past models include a built-in motion spotlight, as well as colored night vision.
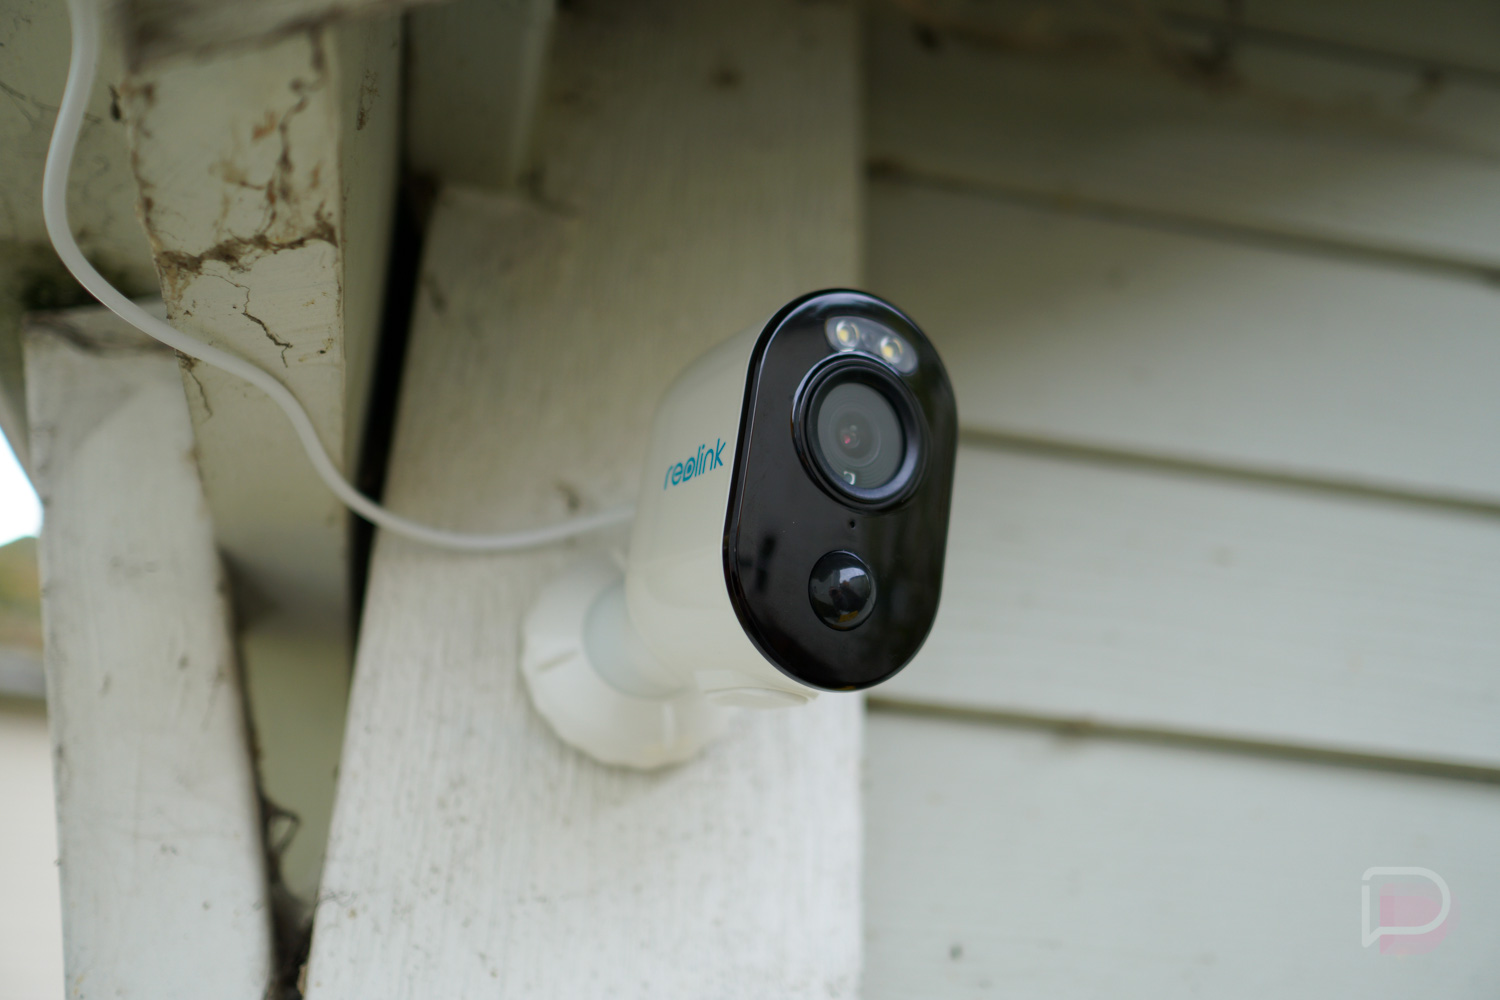
For base features, it offers a wire-free design, 1080p video recording, a compatible solar panel accessory, PIR motion sensor (passive infrared), IP65 weather rating, 2-way audio, privacy masking, built-in siren, SD card support for local storage, and cloud storage. Most importantly for me, I want a camera that has Google Assistant support, meaning I can ask my smart display or my TV to show me the camera feed. I’d much rather ask to see a video feed than to get up and check out the spooky noise myself. This camera offers that and then some.
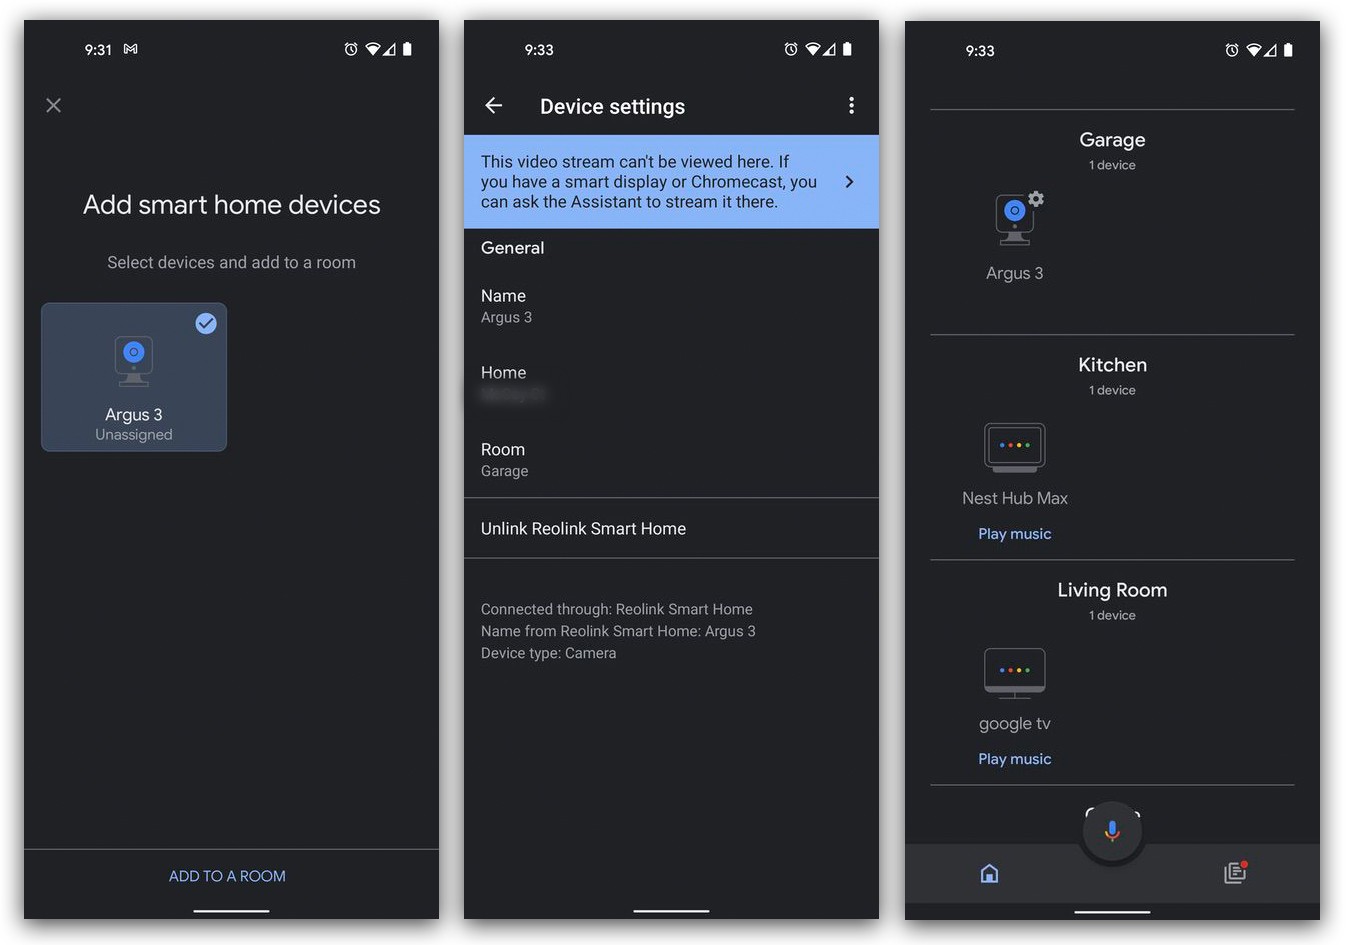
Once the camera is installed where you want it, the set up process is very easy. Thanks to what I’d label as a good app experience, you simply connect the app to the camera, connect the camera to your WiFi, and that’s it. From here, you can go the extra step and enable the camera to provide video feeds to Google Assistant. Once enabled in the Reolink app, you add it to your smart home via the Google Home app. That process is relatively straightforward, though, when compared to setting up a Nest Cam, there are just a couple of extra steps. Once connected, it works flawlessly. I say, “Hey Google, show me the driveway” and boom, it’s magic. I don’t mind a longer set up process so long as it works properly.
So now your camera is all set up and everything is working groovy, it’s time to tweak your settings to just how you like them. Inside of the Reolink app, there are plenty of settings to customize. Under Display settings, you can rotate your video feed if necessary, set the anti-flicker (50Hz, 60Hz, and Auto), set the day-night feature, switch up where the embedded video information is, enable/disable the Reolink watermark, and also set the privacy mask. The privacy mask allows you to black out certain sections of the video feed that you don’t want recorded. Under the basic settings is where you can enable/disable the motion sensor, enable camera recording, enable push notifications, turn on email alerts, enable the siren, enable audio recording, and lastly, enable/disable the built-in status LED. Unlike Google and Nest, Reolink doesn’t care if intruders know that they’re being recorded or not. Thank you, Reolink.
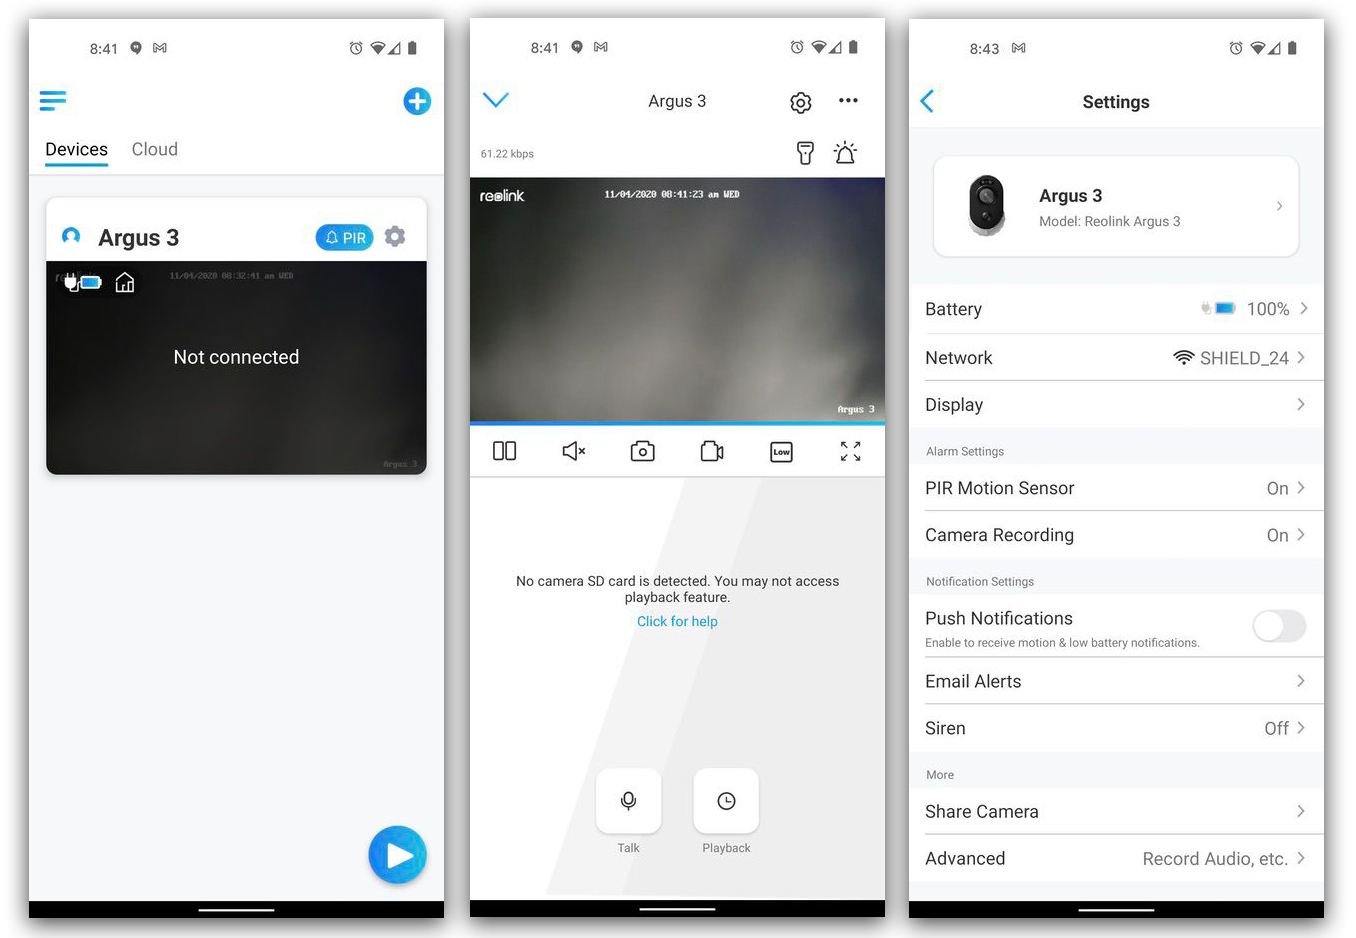
In terms of video quality, it’s very solid. There are two options to choose from, which is important depending on what kind of network connection you have going to the camera. I’ve been running my WiFi to the camera and have the camera set to record 1080p resolution at 15fps with a max bitrate of 1536. These are the default high-end settings. However, you can opt for 720p, lower frame rates, as well as higher and lower bitrates. There’s also a “Fluent” quality option that provides 640×360 resolution, a default of 5fps, and 160 of max bitrate. This option is for those with either poor internet connectivity or those who don’t need ultra crisp video feeds. Having used the Clear 1080p option for the majority of my time, I’d say it looks good in both day and night settings, plus the colored night vision is a bonus, though, wouldn’t be a dealbreaker feature for me.
When it comes to accessing your video, the Reolink app allows you to sort through footage saved on the camera’s storage via an un-included microSD, then there’s a separate UI for footage saved to the cloud. Reolink is generous enough and offers a free tier for its cloud service, providing camera owners with 7 days of video history (or 1GB) with support for 1 camera. For many, that should be enough. Should you need more, you can buy a subscription starting at $3.49/month ($35/year) that gets you 30-day history (or 30GB of storage) and support for up to 5 cameras. More info on Reolink’s cloud storage can be viewed here.
I’ve had the camera in use for a few days, and so far, it’s been fine. It’s the sort of thing I hope I never need, but when I do need it, I’m confident in the video quality and the storage options to ensure I can retrieve my video. There’s not much more I can ask for at this price.
You can sign up to be notified when the the camera will be available for purchase from Reolink right now, though, there’s no official release date for customers. Release shouldn’t be too far away. Good holiday gift, maybe?