If you have already gone over our SHIELD TV review and are thinking about picking one up, or you already own NVIDIA’s latest set-top box, here’s a list of Tips and Tricks that will have you feeling like a pro SHIELD user.
With your basic Android TV box that you can find for $99 or less, there’s not much to know. You basically plug in a HDMI cable and you’re off to the races. With a SHIELD TV, though, it’s an entirely different beast. There is major gaming and sharing aspects, plus the added IR controls to consider. It’s a lot to take in, but don’t worry, holding hands is our speciality.
Here’s a few tips to make you a master SHIELD TV owner.
Sharing and Broadcasting
On top of the Android TV system, NVIDIA has baked in a few features designed to cater towards those who not only love playing video games, but sharing their experiences, too. Thanks to the inclusion of the ability to broadcast gameplay directly to Twitch while you play a game, you can have friends or just random strangers watch you play video games online. Additionally, if you want to take recordings of your gameplay, then edit it and upload it to YouTube, recording video with audio enabled is also available.
To begin the process, fire up whatever game you want to play. Once loaded, long press the Home button on your SHIELD Controller (circle button). From here, you will see a popup window with varying options. Should you already have your Twitch account linked up, you can press “Broadcast.” If your connection is solid and all systems are go for launch, you will see a green dot pop up, letting you know that you are live.
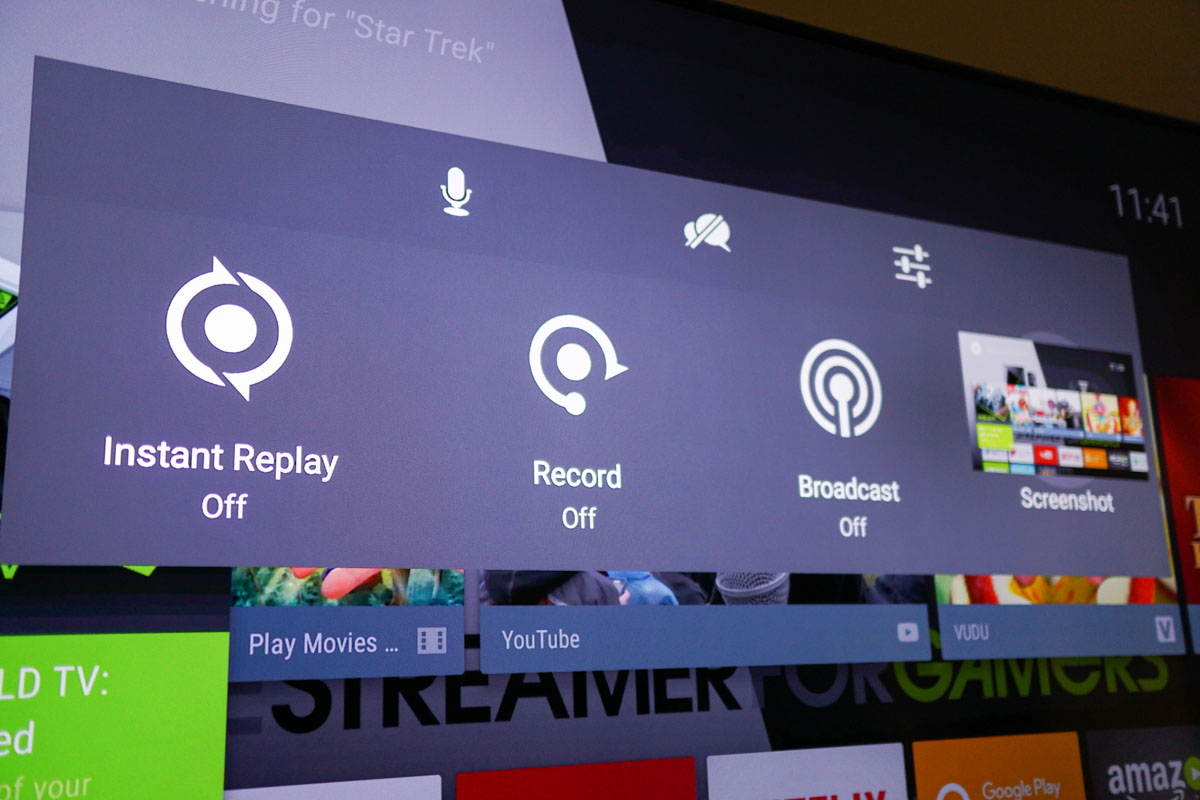
Inside the Settings for this feature, users can change up the quality levels, which is great for those without the best internet connection. On my connection, I was able to stream in 1080p at 30fps just fine, but others may find better performance at 480p. At this time, “Ultra” quality is not available for streaming, but you can record in the best quality, then share the file via YouTube or other services.
Thanks to the SHIELD Controller’s built-in microphone, recording your audio during streaming or recording is made easy. I will say, the quality isn’t top notch, and there’s no direct way to adjust audio levels (gameplay vs. mic levels), but you can manually adjust the mic’s level to suit your needs. Additionally, with the controller’s built-in headphone jack, plus the support of audio passthrough, you can hook up a quality headset to the controller, which is what I did while recording the below DOOM 2 session.
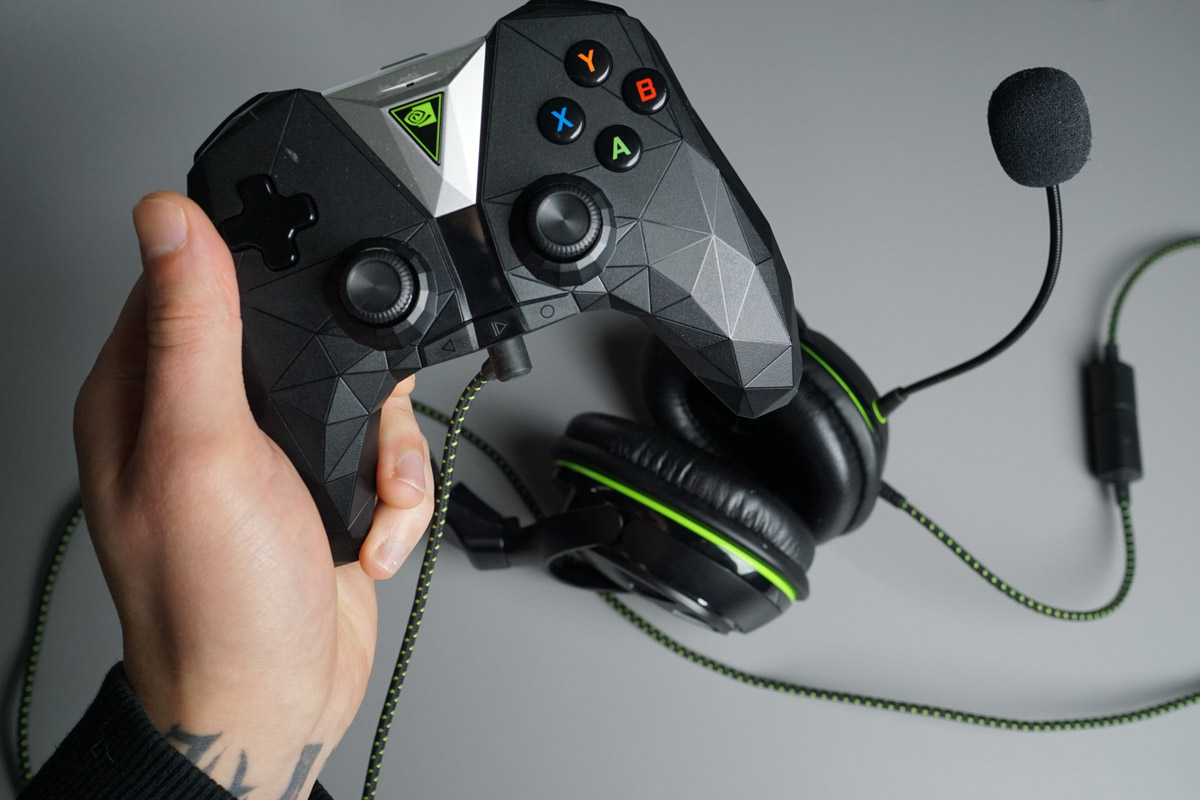
With the headphones plugged in, the game’s audio plays through the headset, with the audio being taken from the headset’s equipped microphone. Again, sadly, there’s no awesome way to adjust audio levels, but with a game’s built-in audio settings and mic level settings, you should be able to create a nice mix for streaming and recording.
Now, watch me stumble through some DOOM 2 (never played this expansion pack) and laugh at me.
Sharing Files To and From SHIELD TV
Over Local Network. Learn those words. Love those words. Cherish those words. As you may or may not know, file manager applications for Android TV are garbage. In fact, after downloading five different apps for Android TV in an attempt to move a few files from one folder to another, I could not do it.
What I was attempting to do was move screenshots from the SHIELD TV’s local storage onto a USB Drive, then get those files onto my computer for usage in my review. Ultimately, that simple task proved too difficult for my brain. While I could have gone through the process of remote debugging the Android TV and doing some ADB magic to transfer the files, ain’t nobody got time for that, especially while you are busy trying to write a full review.
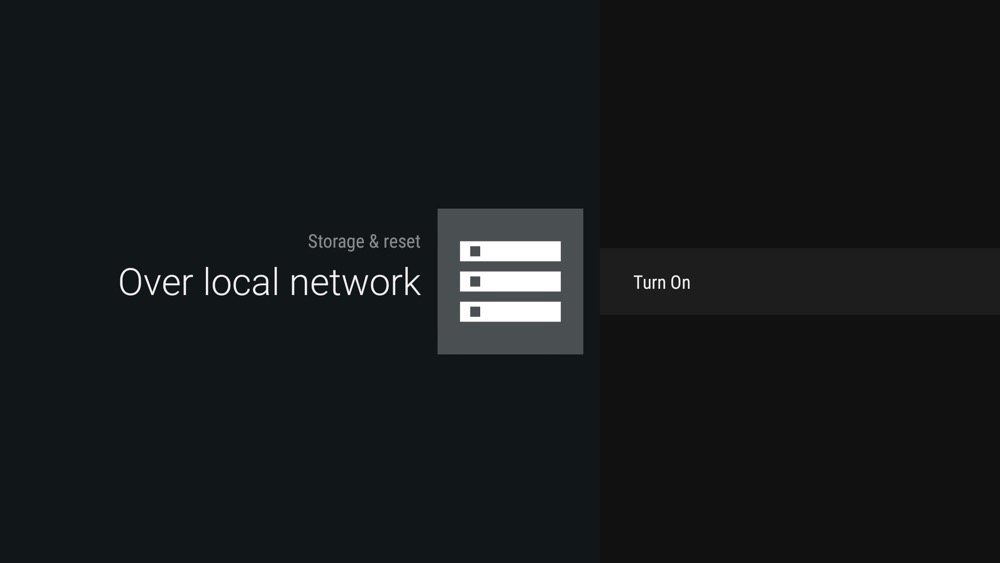
Instead, after an hour of struggling, we remembered the simplistic process of accessing a device’s storage “Over Local Network.” Seriously, the answer was sitting in front of my face for a solid hour before I realized it would solve my problem. When enabled, the SHIELD TV broadcasts a username and password, accessible by a computer on the same network. All I had to do was simply open up the Finder app on my Mac, select the broadcasting “SHIELD” drive, then input the username and password that SHIELD TV provided me with. Once entered, I had access to all of the device’s files from right on my desktop.
For all of you networking and IT wizards, you probably knew about this, but for average folk like me with zero networking background, it was a complete miracle and I awoke this morning with a sense great accomplishment. Now, as I stated in the previous tip, you can use this trick to gather your video recordings from SHIELD TV onto your desktop for editing and uploading. Seriously, don’t mess with cables or file managers, use Over Local Network!
Using IR Blaster on Remote and Controller
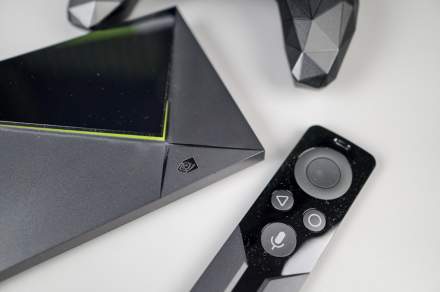
Both the SHIELD Remote and SHIELD Controller come with an IR blaster, unlike the 2015 models. Since everyone seems to love blasting IR all over the place, this was a great move by NVIDIA. So long as you have what I’d call a mainstream television, setting up and using these blasters should be super painless.
Personally, I use a Vizio in my living room, which the SHIELD TV automatically recognized, making setup a breeze. Should you be in the same boat as me, simply head to “Power Control” under the Display & Sound settings menu. In this section of the menu, you will see an option for “Setup IR for TV” and “Setup IR for Receiver.” Once clicked, SHIELD TV will ask you to confirm your type of television, then proceed to set itself up by lowering and upping the volume of your TV. For me, all went well and I confirmed that the volume did rise and lower.
Once complete, you can go ahead and control the volume of your TV or sound bar, allowing you to set aside one of your other remotes. Seriously, the over cluttering of coffee tables with remotes is a problem.
Adoptable Storage
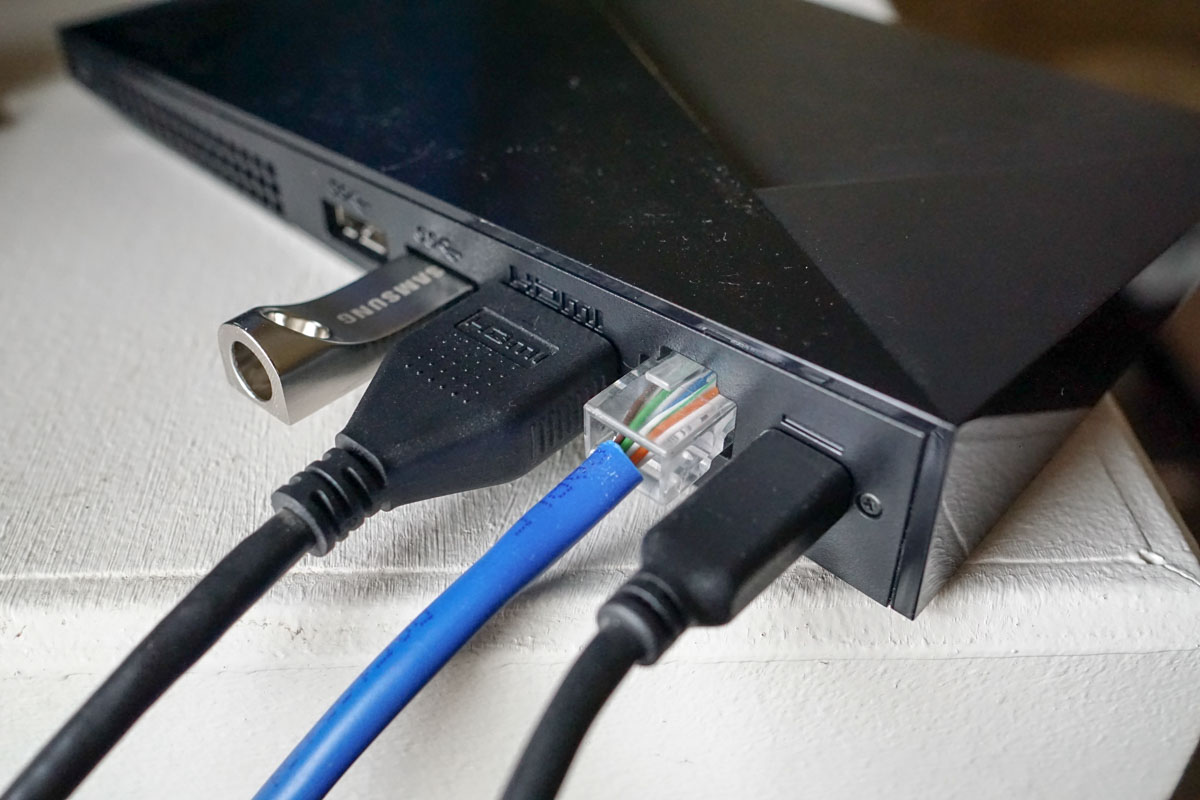
I mentioned the deal with the base model’s 16GB storage capacity in my review, and to followup on that, one of the first things you should do with your new SHIELD TV is slap on a USB stick to up its storage capacity. With all of the apps and games you’re probably going to download, anyone with a 16GB model will be running out of space very quickly. To help solve this problem, Android has Adoptable Storage, which allows USB drives to be adopted as local storage. It’s a gorgeous, miraculous feature.
To do it, we will want a USB 3.0 unit, provided we need as much speed as possible. Once you have that, stick the USB drive into the SHIELD TV’s USB port closest to the fan. Once inserted, head into Settings and click on the inserted USB drive under the “Device Storage” option in the Storage & Reset menu.
From here, click on Format and Adopt, which will then take you through the steps of formatting the USB drive and adopting it as local storage. Before doing so, make sure you don’t have any important data on your USB drive, then go for it. The process of formatting may take a few minutes, but once complete, SHIELD TV will ask if you’d like to transfer any app, photo, or video files over to the USB drive. You can choose to do that now or later, but just know that moving forward, you will have more space to store all of your goodies.
Rearranging Home Screen, Switching Between Apps
With Nougat, ways of rearranging application shortcuts on your home screen has not changed much, but the process does seem to be a bit more fluid. Additionally, with Nougat, switching between these applications with a dedicated switcher has been implemented.
To change up the order of your apps, hover over the row you want to customize, then long press on one of the shortcuts using the A button. Once it becomes highlighted, you can rearrange the shortcuts however you’d like with the SHIELD Controller’s thumbstick or SHIELD Remote’s D-pad. This process will lead to quicker access of the apps you use the most. For example, if you use Netflix and YouTube more than other apps, you can make sure they are at the front of the row, so no more scrolling through to access them.
Pro tip: You can use this same process to quickly uninstall applications you no longer use. Simply drag the shortcut to the bottom of the screen where you see the “Uninstall” option.
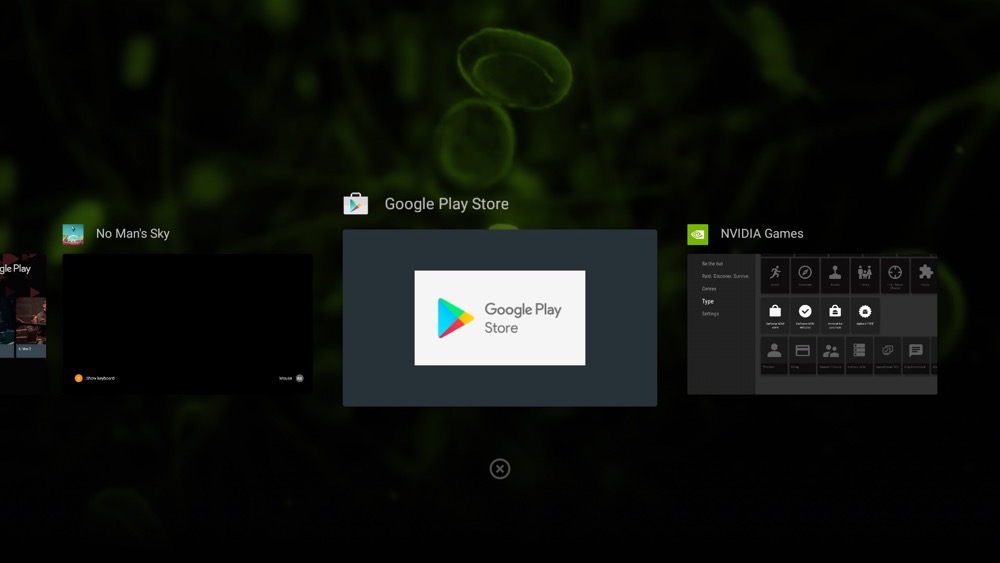
For switching between apps, double press the Home button (circle button) on your remote or controller. Once clicked, all of your recent applications will be in front of you. To access, simply navigate to the one you’d like to open with the D-pad or thumbstick, then click on it with the A button. It’s quick and easy, just the way we like it.
There you have it, a few tips to get you started. If you have your own tips for SHIELD TV, let us know in the comments so we can check them out!