Whenever we get a new Nexus device, like the Nexus 5, our mind thinks two things immediately. The first is to unbox the device (Nexus 5 unboxing) and let you all see which product is up next for us to review. Once we are finished there, we immediately go and unlock the bootloader. Why? Well, because unlocking the bootloader of a phone puts the device through a factory reset. Rather than setting the phone up and making it all personal, we like to unlock the bootloader so that we don’t have to worry about it ever again. Once done, we can then get on about our business reviewing the phone and turning it into our daily driver. Plus, if we decide we want to flash a ROM, root it, or put on a custom recovery, we are all set to do that without issue.
If you are interested in any of those things in the future, this is your first step to making that happen. But you should be warned that unlocking the bootloader of your phone “may” void its warranty, at least according to the unlock screen. You can always re-lock it if you’d like or should you run into warranty claims.
Ready?
Instructions
*Warning – Unlocking the bootloader of your phone, “may” void your warranty.
*First things first, you need to setup the Android SDK so that you can use adb and fastboot commands. There are countless tutorials around for getting this setup, but it’s really not that difficult any longer to get this up and running. Simply download the latest Android SDK from Google, unzip the contents of the file, and head into the platform-tools folder where adb and fastboot should be located. Open a command prompt from within there.
1. Enable “Developer options” by tapping 5 or 6 times on the Build number in Settings>About phone.
2. Hit back once and choose Developer options; check the box for USB debugging.
3. Plug your phone into your computer.
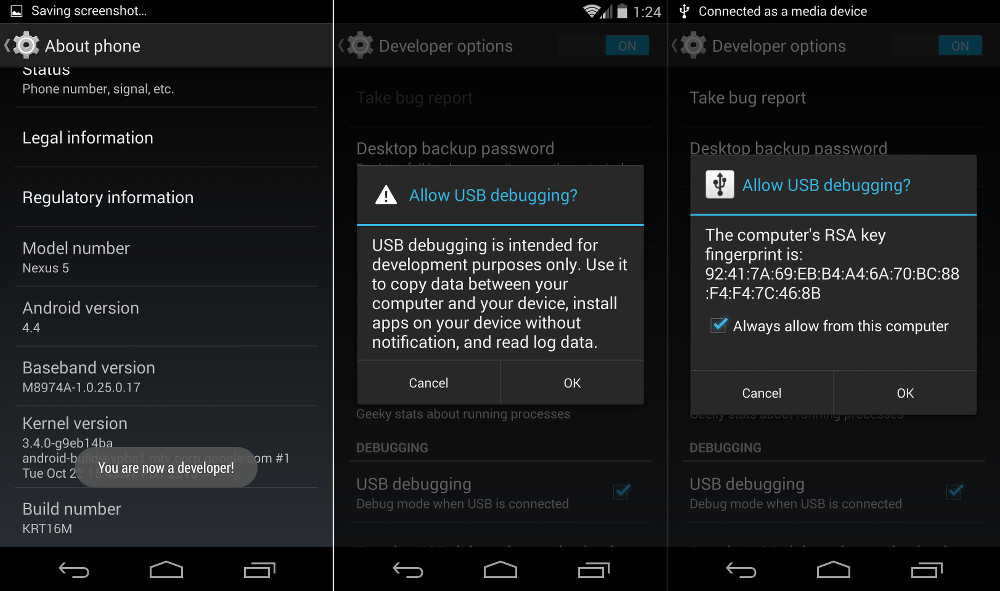
4. You’ll need to give it USB debugging access (don’t forget to check the box).
5. Once you have given your computer debugging access, it’s time for commands. Type in a command prompt:
adb reboot bootloader
(Note: If using a Mac, it’s ./adb reboot bootloader or ./fastboot -insert comand-)
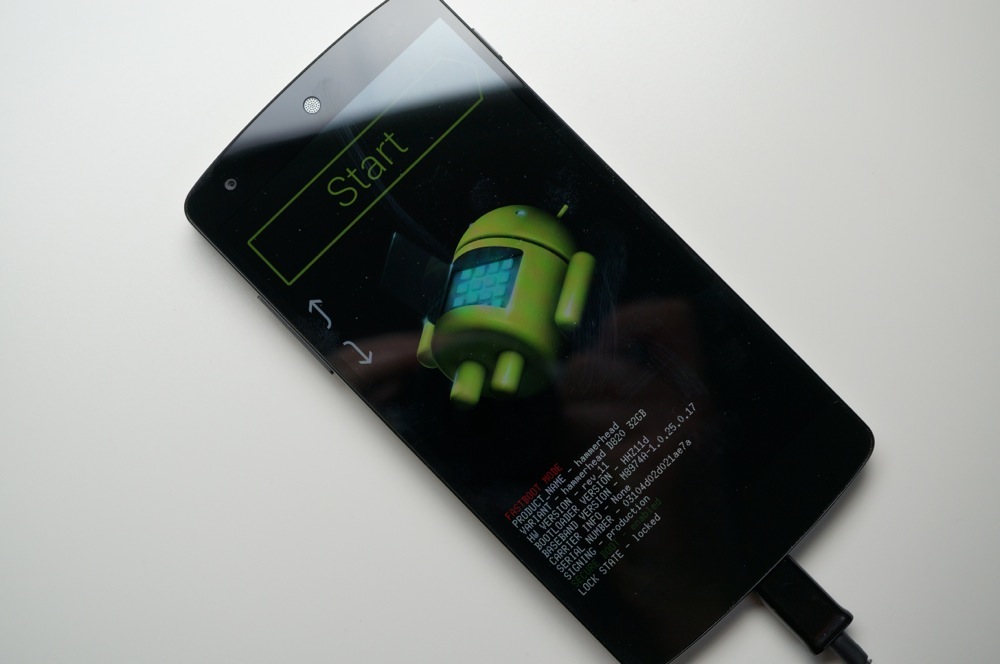
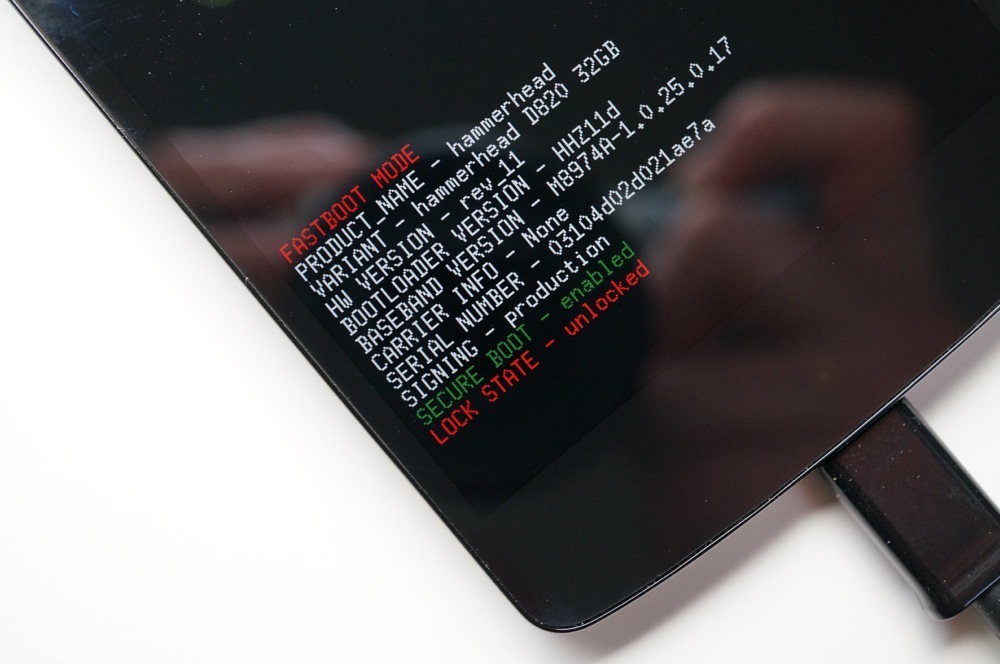
6. Wait for your bootloader screen to appear. Once it does (big Android with START), type:
fastboot oem unlock
7. A bootloader unlock confirmation page will appear. Tap Volume Up to highlight “Yes,” and Power to select it.
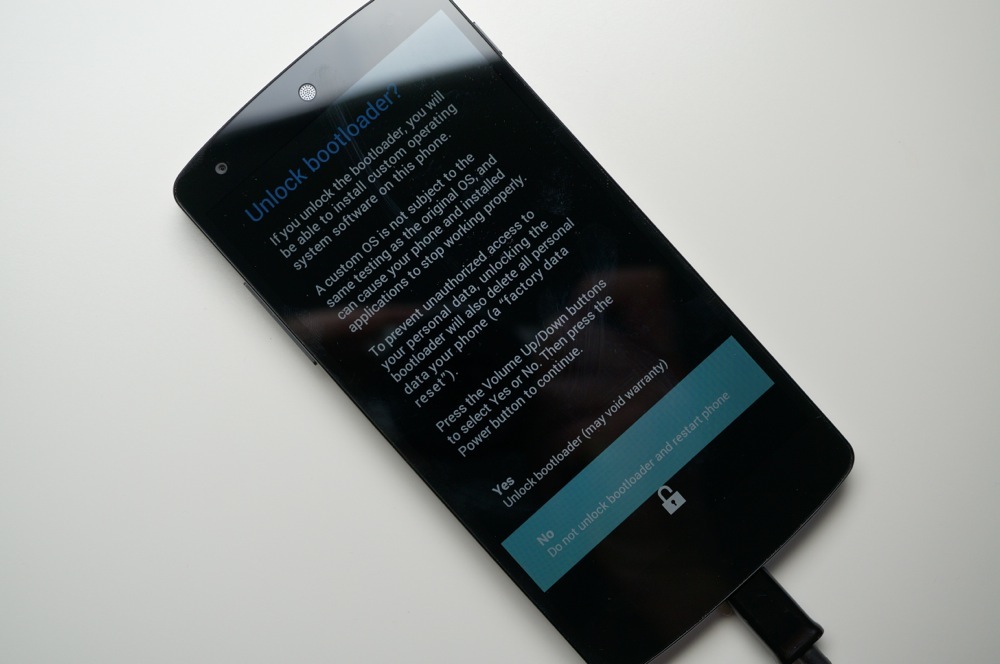
8. Your phone will then be erased and the bootloader unlocked. Shouldn’t take more than a minute or two.
9. Your bootloader is now unlocked and ready for root, ROMs, recovery, etc.
*Note – We did not just root your phone or flash a recovery or really do much. Your bootloader is just now unlocked and ready for you to tinker as you please. You “may” have voided your warranty though.
10. You should be on the bootloader screen showing “Start.” Press Power to reboot your phone.
11. During reboot, your phone will go through a factory reset.
12. Once it boots back up, you are done. If everything went correctly, you should see an unlock icon during boot.
More on the way!
Collapse Show Comments101 Comments