Part of the beauty of owning a Nexus device comes through the regular availability of factory images that can be used to return the device to a factory state. If you root, toss on a ROM, and tinker a bit too much, you may find yourself looking for a last resort to save your phone. A factory image can do that. Or maybe you need to wipe your phone clean because you are done with it and need to pass it along to a friend or family member (or in a back alley deal on Craigslist). Again, a factory image can do that. Think of a factory image as stock, out-of-the-box software for your device.
Google has been pretty good over the years at making these image files available shortly after they release a new update or version of Android. That situation hasn’t changed with the release of Kit Kat (Android 4.4) or the Nexus 5, as Google has already made the N5’s factory images available.
So for those of you who plan to get dirty with your Nexus and may need a savior down the road, we thought we’d make sure you know how to flash .img files to your Nexus 5. The process isn’t difficult, but does require a few adb and fastboot commands. But you are up for that, right?
NOTE: These instructions were originally written specifically for the Nexus 5, but they will work for Google Pixel devices as well. All you need to do is make sure you have downloaded the correct factory image file that you want to flash for your particular Pixel device and follow the instructions, replacing file names with the files names in the factory image you downloaded.
Instructions
*In order to flash factory images, you’ll need to have the Android SDK set up. Download the latest SDK here.
*Flashing factory images wipes your phone completely clean, leaving it at a factory, out-of-the-box state.
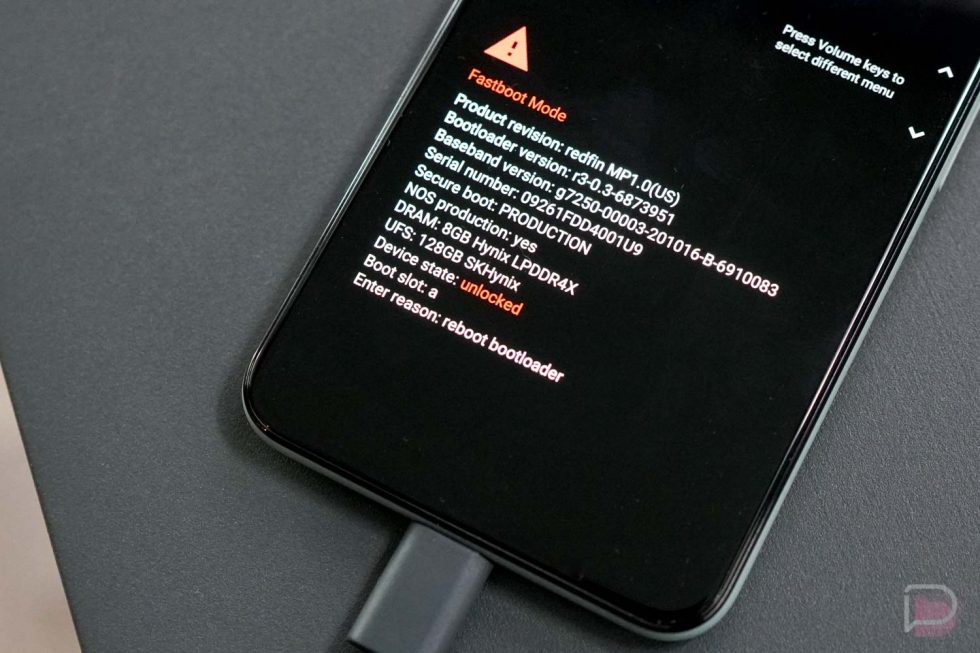
*You’ll also need an unlocked bootloader.
1. Download the newest factory images to your PC.
2. Unzip the file and its contents into your SDK/platform-tools folder.
*Make sure they are not in their own folder, but have all been extracted to platform-tools.
*We care about platform-tools, because that’s where your adb and fastboot are located.
3. From within your platform-tools folder, open a command prompt.
4. Type the following commands, allowing each to finish before moving onto the next:
*These instructions are for the 4.4 (KRT16M) files. If you stumble upon this later, be sure to adjust the filenames depending on the factory images you download.
*If using a Mac, be sure to add ./ in front of all commands (ex: ./fastboot reboot-bootloader)
*If you are updating a WiFi-only tablet, there is no radio.img to flash.
*If you don’t want to wipe data, remove the “-w” in the second to last command.
adb reboot bootloader
fastboot flash bootloader bootloader-hammerhead-HHZ11d.img
fastboot reboot-bootloader
fastboot flash radio radio-hammerhead-M8974A-1.0.25.0.17.img
fastboot reboot-bootloader
fastboot -w update image-hammerhead-krt16m.zip
fastboot reboot-bootloader
5. If you want to go back to 100% stock with a locked bootloader type:
fastboot oem lock
6. If you want to keep your bootloader unlocked, simply tap the Power button from the START screen.
7. You are now back to 100% stock.
Note: At the point where you enter fastboot commands to flash individual files, you can think about running included scripts that will flash everything for you. All factory image files should have a flash all file. This will save you from having to manually enter in each line. I’ve had terrible luck with the included flash all scripts, but you may have success.
Once you reboot to the bootloader, you can try typing “flash-all.bat” if you are on Windows or “./flash-all.sh” if on a Mac into your command prompt. If you go this route, you’ll be able to sit back and watch each .img file being flashed. Just remember, you do not want to unplug your phone at any time.
And there you have it, flashing factory images.
Collapse Show Comments39 Comments