
We had held off for the most part on walking you through the flashing of a custom ROM for your Galaxy Nexus until there were a number of options out there that were stable. I think it’s safe to say that there are more than a “number” that are well worth your time at this point. We have highlighted a few in the past, all of which have made incredible progress in just a short amount of time. So to get you into your first ROM (if you haven’t flashed one already), we have the step-by-step guide below to get you living the Nexus dream.
Instructions:
1. Unlock the bootloader of your phone. [Instructions]
2. Root your phone, flash a custom recovery and make your first backup. [Instructions]
3. Before we get into all of this, you may want to backup all of your apps and user data.
*When flashing a ROM, you almost always have to perform a factory reset (wipe data) which clears your phone of all personal apps and settings. A tool like Titanium Backup from the market can back all of these up for you to be restored after flashing a ROM. This is a must-have app for frequent ROM flyers.
4. Find a ROM that meets your needs. A couple of ideas here and here. [More]
*I personally chose the CM9 kang because it included the 4G LTE notification bar toggle we posted over the weekend. So far, it appears to be fully functional.
4. Download that ROM to your phone along with the “Gapps” that are listed near it.
*”Gapps” are your core Google apps like Gmail, Calendar, etc.

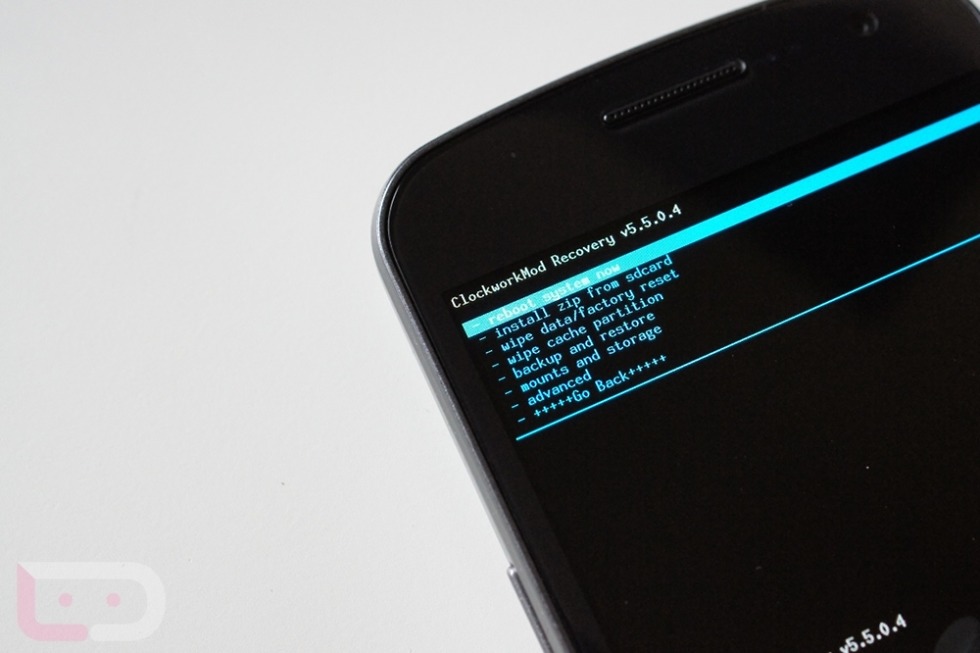
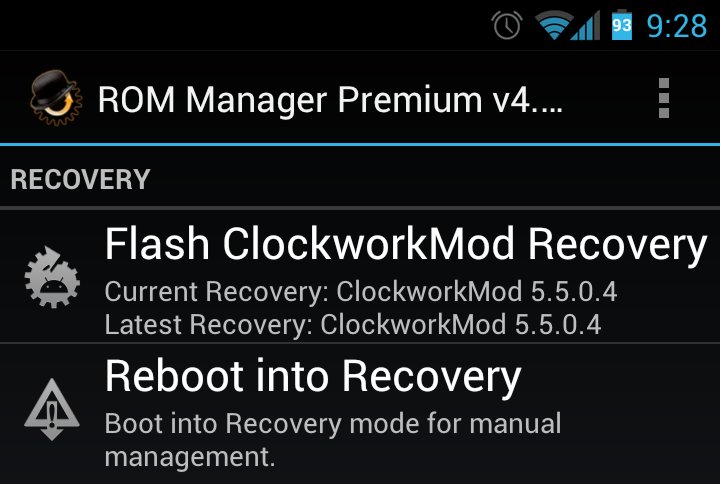
5. Once they have finished downloading, you need to boot into recovery (easiest way through ROM Manager).
*If you did not flash a “permanent recovery” you will need to open ROM Manager and flash Clockwork Recovery before rebooting into recovery.
6. If you did not create a first backup in step 2, do so now before flashing your first ROM.
*Using volume keys, scroll down to “backup and restore” and select it with the Power switch. Then select “backup” and allow your phone to create a backup.
7. Once your backup finishes, scroll down to “wipe data/factory reset.”
*This will wipe your phone completely clean. Hopefully you backed up your apps and data in step 3.
8. From here, you will want to read specific instructions that the ROM developer has given.
*Some ROMs require you to wipe specific caches or wipe data twice. Do as they tell you.
9. Time to flash the ROM. Scroll to “install zip from sdcard.”
10. Select “choose zip from sdcard” and find your ROM.
11. If you downloaded the file to your phone directly, it should be in your “Download” folder.
12. Once you have navigated to where your ROM of choice was downloaded to, select it. Then say “Yes.”
13. Your phone will now flash your first custom ROM.
14. When it finishes, “Go back” to the main menu. It’s time to flash our “Gapps” package.
15. Head back into “install zip from sdcard” and “choose zip from sdcard.”
16. Likely in the same place as your ROM, you will find your Gapps file. Select it and flash it just like the ROM.
17. Once that finishes, back out to the main menu and reboot the system.
18. The first boot can take a while depending on the ROM. Just be patient and let it boot all the way.
19. Once it finishes, enjoy your new ROM.
20. You may want to download Titanium Backup immediately and start restoring all of your apps and data.
Any questions?
To find out even more about this device, check out our Complete Guide to the Galaxy Nexus.
Collapse Show Comments142 Comments